 USA
USA CANADA
 EUROPE


Wool Felt Tea Cozy with Appliqué

Tea is a morning event, less about the caffeine for me, and more about the ritual of a hot beverage keeping me company while I am working. I was gifted with an insulated metal travel mug a few years back, it does an amazing job keeping my tea nice and warm all day but not all of us are so lucky, so let’s make a cozy to keep our tea toasty!
I have several teapots, all different sizes and shapes, and they all need different size tea cozies to keep that cuppa warm. My mother passed on to me, some lovely teacups and fine china. I enjoy using the dishes and delicate cups daily … I don’t like to wait for special occasions to use nice things, every day is special.
I think it’s more useful to provide instructions on how to make a tea cozy to fit any teapot. If you are anything like me, you’ll need more than one. You can always build on to the basic pattern to make something fancier if inspiration strikes.
With this cute DIY tea cozy on your teapot, your tea will stay nice and warm much longer and you’ll be able to enjoy hot tea without having to reheat it!
Here’s how to make a tea cozy for yourself, regardless of the size of your teapot.
- 100% Wool felt (1.2mm or 3mm)
- Embroidery floss
- Needle with large eye
- Ribbon for loop or embellishment
- A large sheet or several sheets of printer paper
- Scissors
- Pencil or pen
- Measuring tape
- Ruler
- Straight pins

Measuring Your Teapot
- Measure the width of your teapot around the widest point and jot down the measurement.


- Measure the height of your teapot all the way around, top to bottom.


- Blue Pot (2 cups): 44cm wide x 32cm tall – divide the measurements by 2 (22cm x 16cm)
- Brown Pot (4 cups): 54cm wide x 38cm tall – divide the measurements by 2 (27cm x 19cm)
- Steel Pot (6 cups): 52cm wide x 48cm tall – divide the measurements by 2 (26cm x 24cm)
Making The Pattern
- Take your paper and fold in half or you can draw a straight line off to the side. This is the center or FOLD line.
- Draw a line for the base measurement of the cozy, 90 degrees from off the fold line.
- Mark the height of your teapot on the paper from the bottom line.
- Mark the width (1/4 of the total measurement if you are using a FOLD line).
- Draw a second vertical line at the width measurement.
- Draw a curve from the top line to the side line. Cut the pattern out on the line and unfold or leave as a FOLD line. I like to write which teapot this is for on the pattern, for future reference.


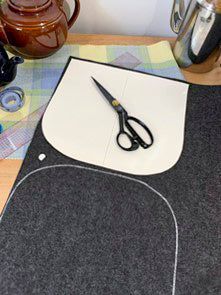
Cut Out All Pieces
- Decide what thickness of wool felt you want to make the cozy from, if using the 3mm or larger thickness cut 1 piece for each side, if using the thinner felt, 2 layers per side is recommended.
- You can trace the pattern onto the felt with tailor’s chalk, wax or pencil.
- Cut out all pieces following the pattern.


Applique: Design
- The best part of any project is adding the Pizzazz! You can match your tea cozy to your kitchen colours or theme: Rooster, Roses, Chili Pepper, etc. I like to include embroidered words of wisdom (AKA: PUNS) in my Tea Cozy designs. “HOT STUFF” is a favourite along with “Time for Tea” or “Steep Dreams.”
- Once you decide on your design, you should check to see how it fits on the cozy. If you find you need to tweak your design after laying out, do that now.
- Cut out the shape(s) for your design.


- It’s easier to sew the applique down before the sides of the cozy are sewn together.
I prefer to use a blanket stitch, not only for seams but in doing the applique work.
You can use any decorative stitches you want.


- I’ve cut out my shapes and positioned them on the cozy until I am happy with the way it looks.
I pencil out the letters on the felt and use a chain stitch to out line the letters and create a ‘x’ pattern in red to fill out the letter and add interest.
I like the look of this letter style and use it often.

- The best way to put the design together is to figure out what elements are in front of what other elements, and work from the back to the front.
In this case HOT is first as it is furthest back, then the peppers and then STUFF.
You can see the back of STUFF and all the stitches I used, all hidden and enclosed nicely as it is sewn down.


- The last to be stitched down were the peppers, I added some details to make the pepper look more detailed and stitched on the stems.


- Before we stitch the sides together, I finish the bottom edges of cozy using the blanket stitch. This Is just decorative as felt has a great edge that doesn’t fray.


- To make it easier to remove the cozy from the hot tea pot, I like to add a tab onto the top.
You’ll want to measure the centre of the tea cozy and mark it.
Choose a sturdy material, I found a nice grosgrain ribbon in my stash.
Cut it around 3-4 inches, and fold over.


- Sew it down to the inside of the back cozy piece at the marked center.


- Taking you two sides, pin them together with right sides facing out.


- Blanket stitch all the way around the outside edge.
As you are sewing through 2 layers of 3mm felt, I recommend using a thimble as it does require some effort to push the needle thru.
Once you have stitched the two sides together, your tea cozy is ready to use!


Did you try this Fall project? If so, be sure to snap a photo, share on social media, and tag @the_felt_store and @bedlamcatsstudio.
If you have any questions regarding a specific product used in this article, please contact a Customer Service Representative by emailing sales@thefeltstore.com or calling 1-866-757-3358.
Leave a comment