Lollipop Bouquet Halloween Costume Tutorial {Template}

Calling all sweet tooths! Halloween will be right around the corner before you know it, which means now is a great time to get a head start on making a costume that you’ll love! I’m Landon Carletti of @entiredreaming here to show you how to make a wearable Bouquet of Lollipops costume from start to finish. If you have the skill and patience, this tutorial can be done with the sewing machine or simply with a good, strong glue. If going the sewing machine route, this tutorial is recommended for intermediate sewers as the small parts require some careful maneuvering.
Materials:
- PDF Template (Lollipops)
- PDF Template (Base)
- SVG Template
- Acrylic Craft Felt in the following colours:
- Ivory
- Turquoise
- Shocking Pink
- Violet
- Plum
- Mint
- Scissors
- Glue suitable for fabrics
- Stick-on Velcro
- Sewing Machine (optional, for experienced sewers)
- Threads in matching colours (for those using the sewing machine)
- Pins
- Flexible tape measure
- Ruler
- Marker

Steps:
1. Cut out background pieces and lollipop pieces either using the provided SVG files with your Cricut cutter or by printing out the PDF files and cutting them out with scissors. For the main costume body piece, only the PDF is used because the shape is too big for the Cricut.


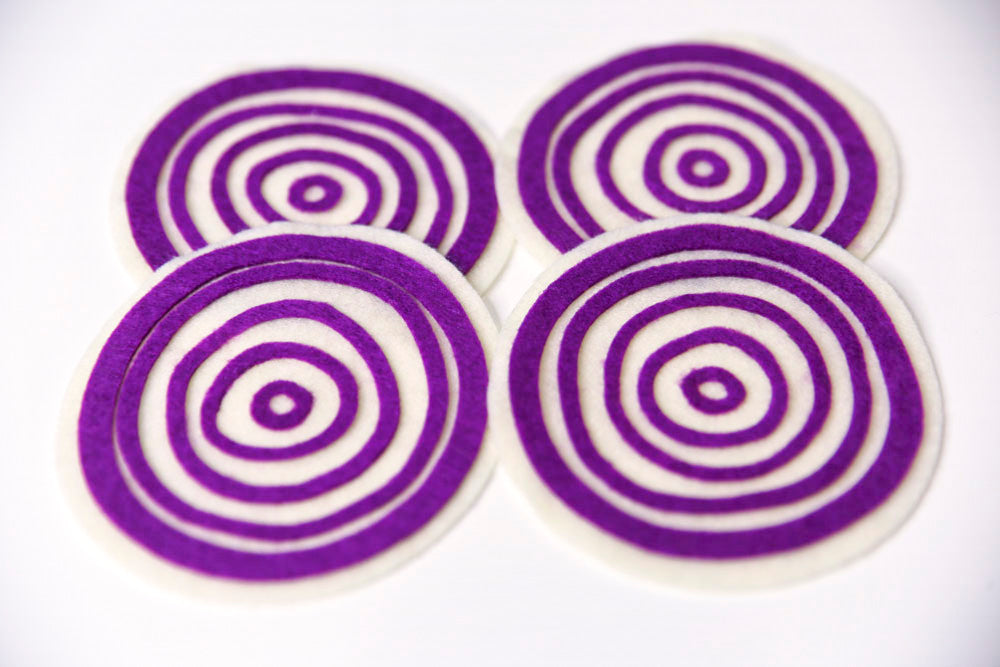
The design is the same on the front and back so we will need the same amount of cut shapes per side. Cut out 2 costume backing pieces, 20 lollipop bases, 6 pink swirls, 30 light purple triangle swirls (5 per lollipop), 4 darker purple targets (each target contains 5 concentric circles), and 32 mint rounded drops (8 per lollipop). I know, it’s a lot of cutting, but you can do it!
So each side has 10 lollipops: 3 pink swirl lollipops, 3 light purple triangle swirl lollipops, 2 darker purple target lollipops and 3 peppermint lollipops. Refer to this picture here for the design:

Feel free to tweak the design as you see fit; if you want all swirl lollipops or more of the peppermints, go for it! Likewise, feel free to place the lollipops wherever you like on the backing! Make it your own!
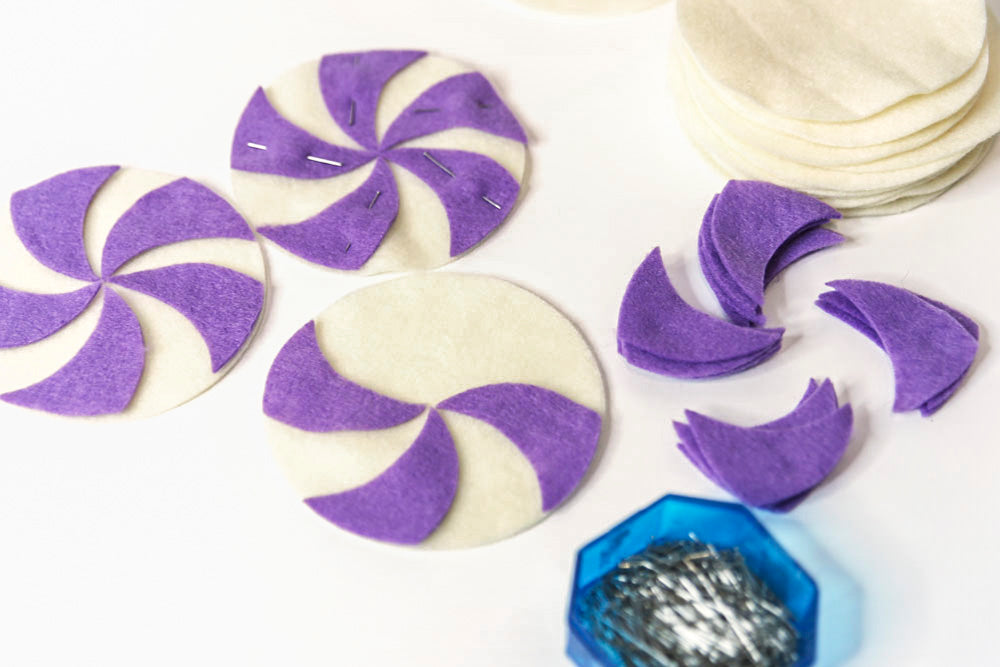
2. Begin attaching the triangle swirls to the lollipops either with glue or by sewing them down with a matching colour thread. Remember, you are making 6 of these triangle swirl lollipops; 3 for the front of the costume and 3 for the other side.


3. Attach the target circles to the lollipop bases. Here I used glue because even I am not that crazy! Make 4 of these in total.


4. Attach the pink swirls to their bases, again either with glue or sewing machine. You’re making 6 of these in total. If using the sewing machine, I recommend using smaller stitches when sewing down small parts as it helps with maneuvering in tighter spaces and curves.


5. Lastly, make 4 peppermint lollipops in total by attaching 8 little rounded candy drop shapes to each lollipop base. To get nice even spacing, I placed the first 4 candy drops in a + formation, directly across from each other and placed the other 4 in between the gaps.


6. Great! Now all the lollipops are created, set those aside for later, we won’t be attaching them to the main backing just yet. Next we will be cutting up strips of ivory felt to use as the lollipop sticks, shoulder straps and side straps. Since there are 20 lollipops we need 20 strips! I cut out strips that were 2” wide and 30” long, but feel free to make them whatever length/width you want. Use a ruler and a marker to mark out the strips and use scissors to cut them out.


7. For the shoulder straps and side straps, you’ll need to do some measuring, pinning, trying on and probably some tweaking like I had to do. Using a flexible tape measure, measure roughly about how long you’d like the shoulder strap to be, starting from your back to your chest (it’s helpful if you have a buddy to hold the tape measure to your back while you note the measurement on the front).
Alternatively, you could also cut out a strip approximately what you think you might need or longer, pin it to the costume backing and then cut it down to size from there. I ended up with shoulder straps that are 13.5” long. Pay attention to the orientation of the shape of the backing. You need to be in between the front and the back once the costume is finished so make sure the shapes edges are matched up with each other; it’s helpful to discreetly mark what is the inside to avoid getting mixed up. The shoulder straps get attached to the inside of the costume either by sewing, gluing or even with stick-on Velcro.
8. The process for the side straps is the same as for the shoulder straps. Now that the costume has shoulder straps, put it on and see how tight you’d like to make it. With your tape measure either measure the length you’d like the straps to be or use a strip to pin there and cut it down to size. I ended up with side strips that are 7.5” long. Again, sew them to the inside of the costume. If you didn’t end up using any Velcro on the shoulder straps, use it here on any one of the front attachment spots; it really helps with getting into the costume!


Note: These photos were taken with the lollipop sticks/strips already attached. In doing this, I learned it’s better to do the shoulder and side straps before attaching the lollipop strips. Take it from me!
9. That being said, let’s attach the sticks! Refer to the same black and white lollipop design layout from earlier in the tutorial to estimate where to pin the sticks as they should correspond to each lollipop. If sewing, just take your time and pay attention to move the strips out of the way as you move along. I sewed squares to secure them but you could attach them using just a secure, straight line for an easier process.


10. Now it’s time to add the lollipops! If you are sewing, take your time and don’t rush here as this part can get hectic with keeping the strips out of the way and working the costume through the sewing machine. But not to worry, as long as you take your time, it will turn out great!
Now, back to the lollipops. Decide on which lollipops you want in the background. Pin them down and attach them. For all the sewers out there, turquoise thread was used in the bobbin and the top thread in a colour matching whatever lollipop is getting attached.


11. They look great! Now, you can either stop here and call it finished if you’re eager to get to loving your new costume or you can follow this step to add whatever finishing touches like sequins, buttons, beads or even trim to finish it all off! Let your creativity run free!


All done!! Now try it on and spin to your hearts content, rocking those twirly lollipops and fringe! This sugary bouquet of sweetness will keep you warm on Halloween night and will surely be a hit on your quest for Halloween candy loot! I hope you enjoyed this tutorial! Share photos of your costumes with The Felt Store on social media and be sure to comment below with how your experience went! Stay safe and have fun on Halloween!

 USA
USA CANADA
 EUROPE


Leave a comment