 USA
USA CANADA
 EUROPE


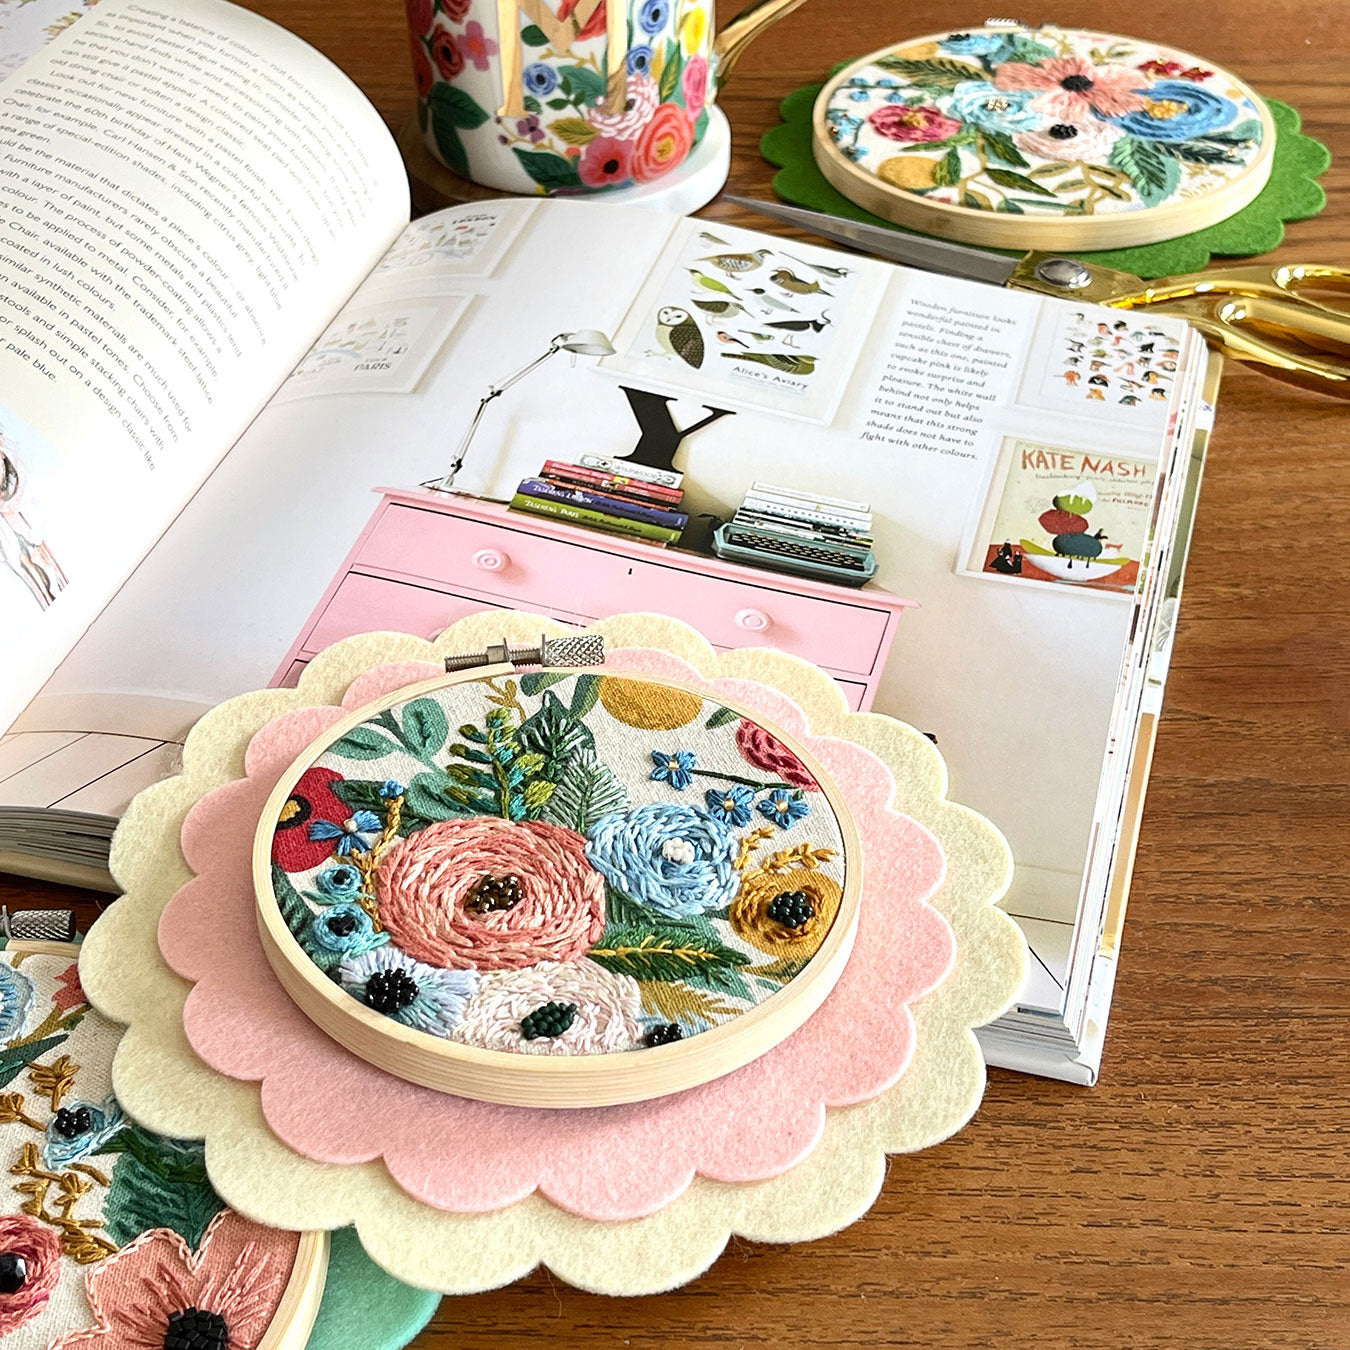
DIY Hoop Art Felt Frames
Here’s a really easy way to give your hoop art projects a little something extra … add a felt frame! This is Lorrie Everitt from @makeandmerryco and I am so happy to share this super simple felt project with you.

For this post, I used The Felt Store’s 100% wool felt in a variety of colors that coordinated with my embroidery hoop art. I also cut out all of my felt shapes using a Cricut Maker. This was my first time cutting 100% wool felt on my Cricut Maker and I will let you in on all of my cutting tips in the DIY instructions below.
If you don’t have a Cricut Maker, you can use my pattern templates to cut your felt using sharp fabric scissors.
I hope that you will want to create these felt frames, so I have included a free download for my SVG files and pattern templates in this post. Please note that the SVG files and pattern templates are for personal use only.

Materials
- Natural or Synthetic Craft Felt
- Fabric Adhesive i.e. E6000 Fabric Fuse
- Embroidery Floss
- Embroidery or Hand Sewing Needles
- Sewing Scissors
If you are going to use a cutting machine to cut your felt you will also need:
- Scallop Circle Frame SVG’s
- Cricut Maker, the Cricut Rotary Blade and a Cricut pink FabricGrip or green Standard Grip cutting mat
Note: If you are using premium wool blend or acrylic felts, I recommend spraying your felt with a fabric stiffener, such as Beacon Premium Stiffen Stuff Spray, to make machine cutting a little easier.
Steps
1. Cut out your felt using either the Cricut cutting machine or by printing out the provided template and cutting the felt manually. We'll go over both methods in this step.
How to cut the felt using the Cricut Maker:
Once you have downloaded the SVG files you will need to decide which size of scallop circle to use for your hoop. The SVG files were designed to be used with four sizes of hoops – 3”, 4”, 5” and 6”.
Upload the artwork to Cricut’s Design Space and plan out your cutting files keeping in mind the size of your felt and your cutting mat.
Good to know: I discovered that the Cricut green standard grip cutting mat works well for cutting 100% wool felt so if you don’t have a pink FabricGrip mat it’s okay.
Machine settings - Use the Cricut Rotary Blade and select the material “Felt, Wool Fabric”.
Note: I am not going to give instructions for how to use a Cricut Maker or Cricut Design Space in this post. If this is your first time using a Cricut Maker or Cricut Design Space for cutting felt, I recommend that you can go to the Cricut website to learn more. I also found it helpful to watch YouTube videos for how to cut felt and fabric when I was learning how to use my Cricut Maker.

How to cut the felt using the pattern templates:
Print out the pattern templates on standard 8.5 x 11” paper size as is. Select the pattern size that was designed to fit a 3”, 4”, 5” or 6” hoop and use it to cut your felt.
I recommend using a good pair of fabric scissors that will allow you to easily cut the small scallop details.

2. Before you can add the felt scallop circles to the back of your embroidery art, you will need to make sure that the back of your hoop art is finished in a way that is ready for framing. Using embroidery floss, sew long running stitches around the edge of the hoop. To gather the excess fabric, pull the embroidery floss tight and end by making a few stitches to hold the floss in place to finish. Trim off any excess fabric.

3. You will use fabric glue or a glue gun to adhere the scallop felt circle to the back of the embroidery hoop.
Apply the glue to the fabric as shown and then carefully center the hoop onto the scallop circle shaped felt. Press in place and allow to dry completely.

Have fun with your felt frames. You can even layer a couple of colors and sizes of felt to make smaller hoop art pieces a little larger.

4. Make it easy to hang your felt framed embroidery hoop by adding a length of embroidery floss to the felt as shown.

And that is it! I hope that this inspires you to make a piece of hooped art just so that you can add a felt frame or maybe re-imagine some hoop art that is hanging on your walls right now. I would love to see your finished projects so please tag @the_felt_store and myself at @makeandmerryco so we can look at what you are creating.
If you have questions about this blog or any of our other DIY tutorials, send us an email at sales@thefeltstore.com or call us at 1-866-757-3358.
Leave a comment