 USA
USA CANADA
 EUROPE


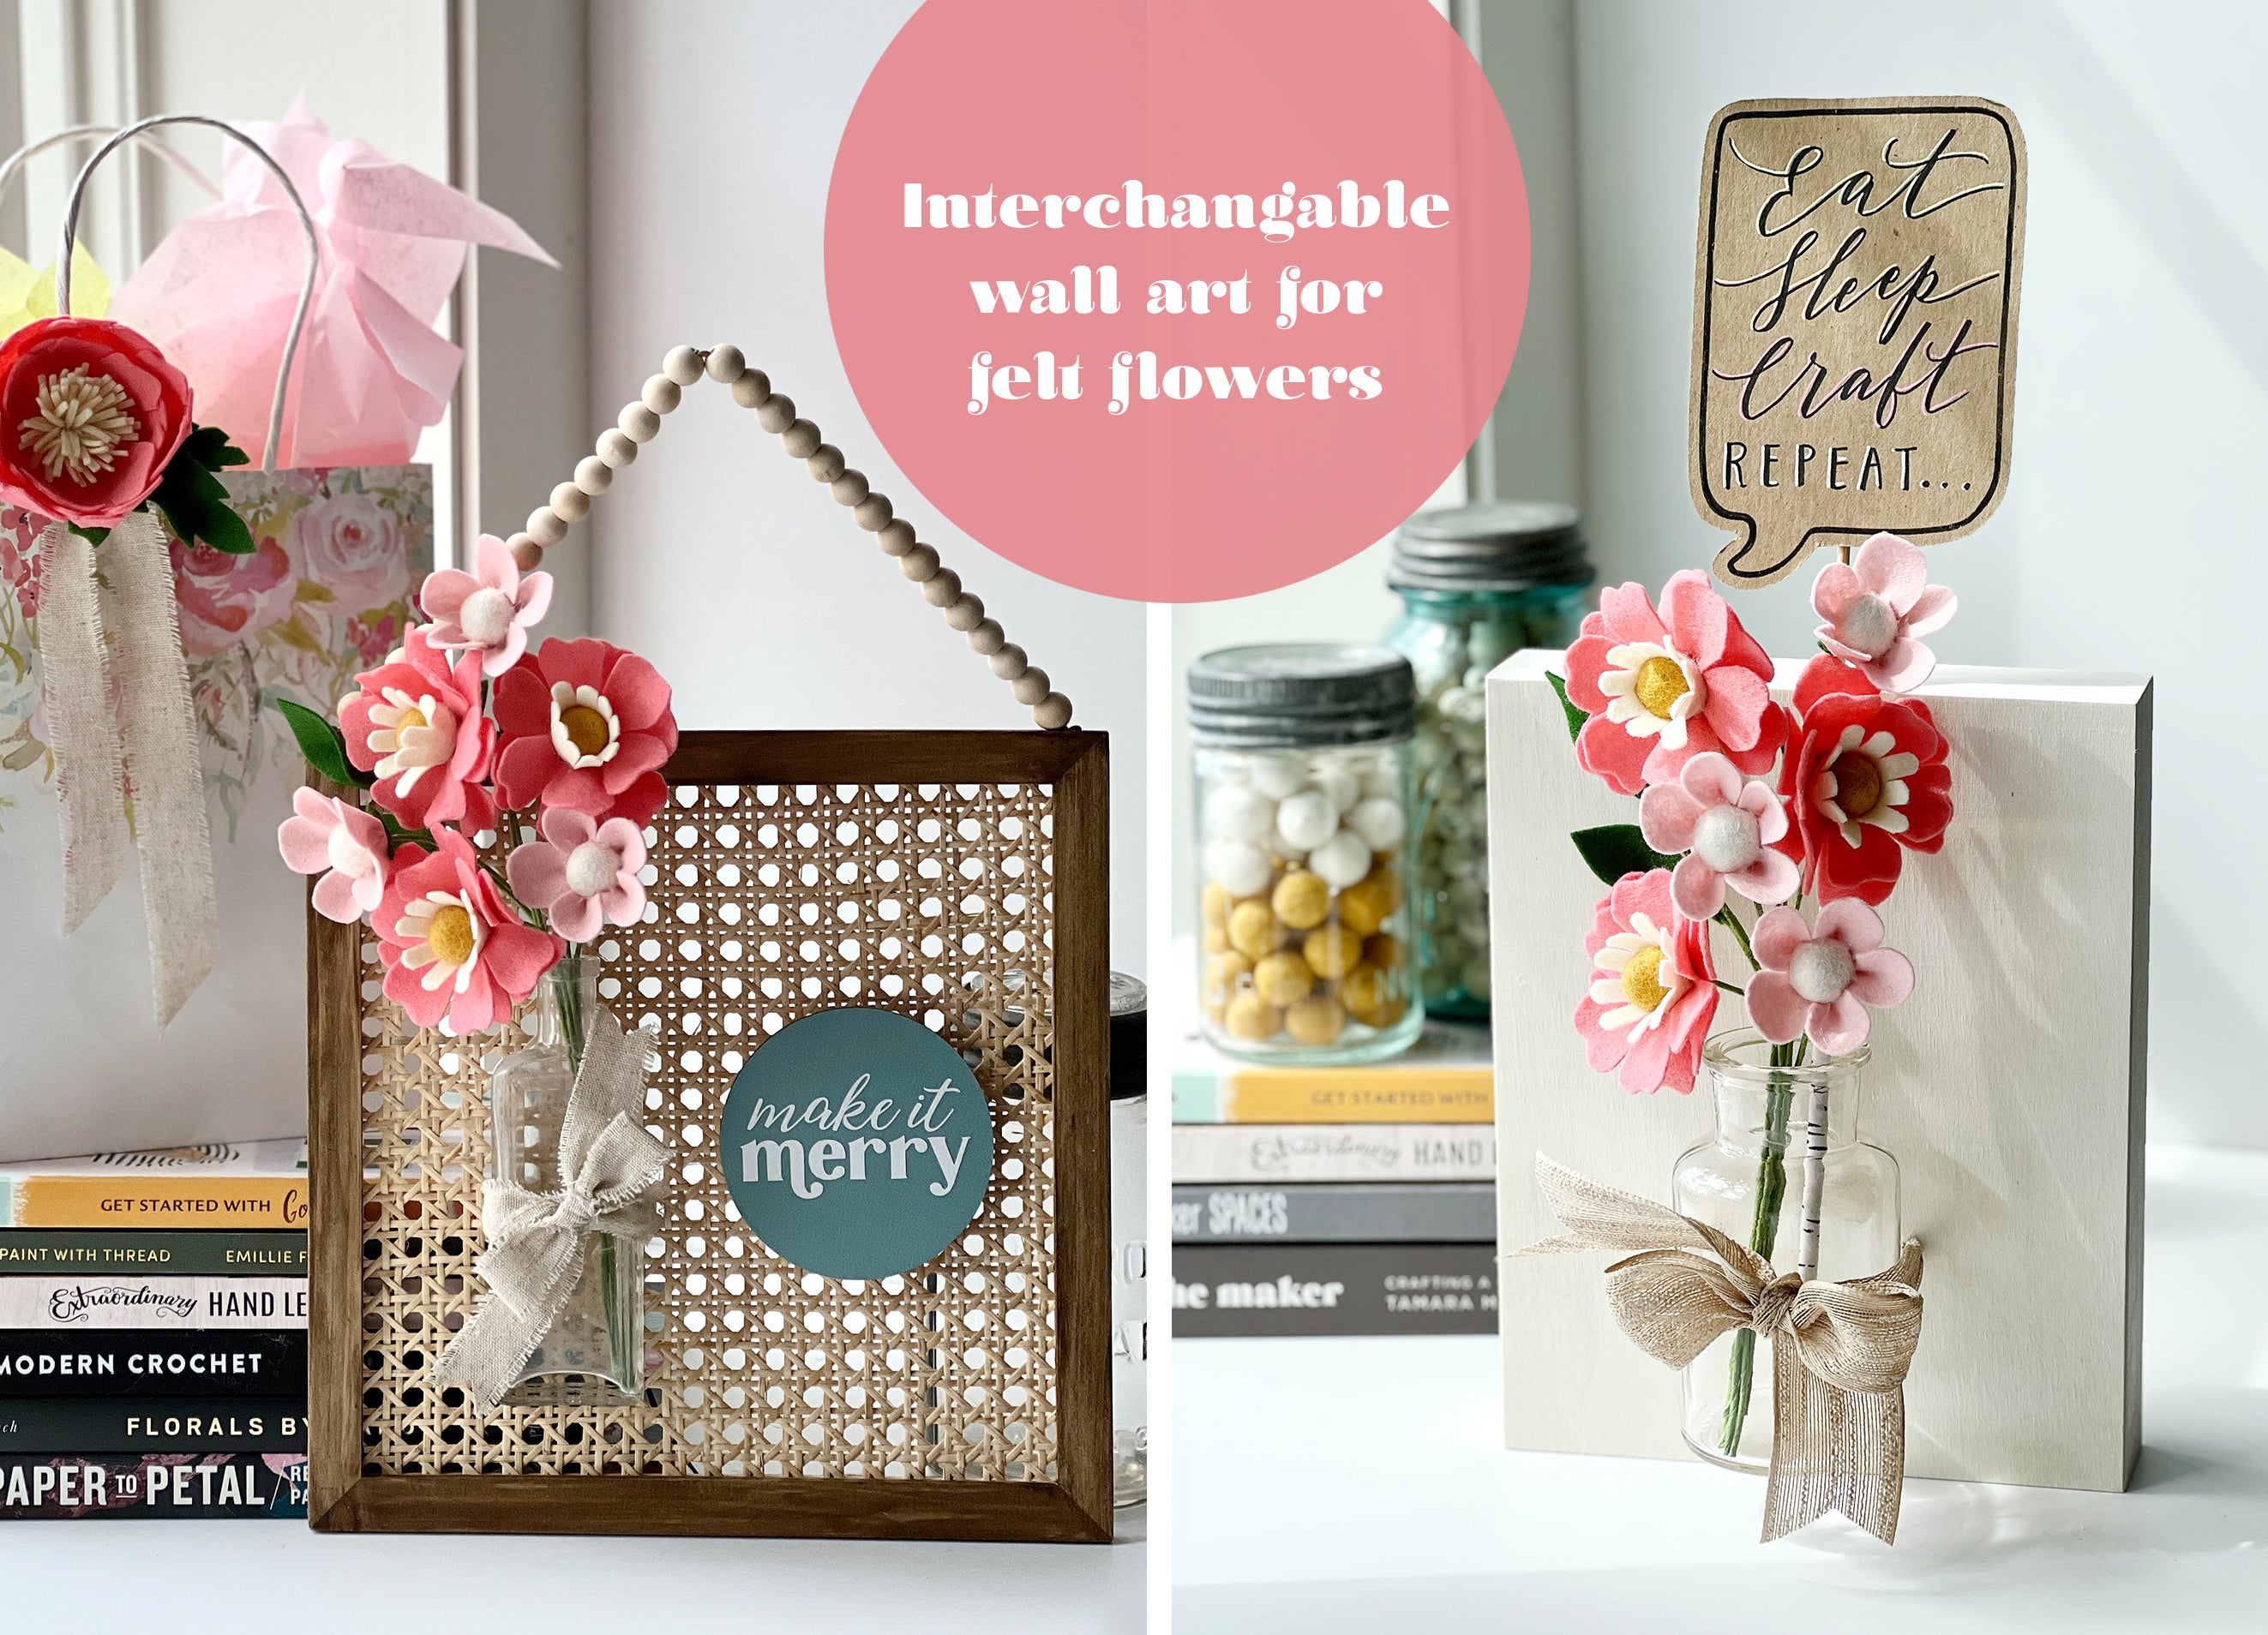
Felt Flower Bouquet Wall Art
Hey there felt crafters! Do you like to update your home décor with the changing of the seasons or to celebrate a holiday? If so, this DIY project was designed especially for you.
This is Lorrie Everitt from @makeandmerryco and I am so excited to share my DIY felt flower bouquet wall art with you. In this post, I am going to share how I created my Mother’s Day felt flower bouquet and an interchangeable wall art frame.
Let’s gather our supplies and tools:
- 100% Wool Craft Felt
- Mini Wool Felt Balls
- Floral wire
- 18-gauge wrapped
- 22-gauge
- Bright green floral tape
- Fabric scissors
- Pliers and wire cutters
- Fine tip hot glue gun and glue sticks
- Two twist ties
Optional:
- 7mm scallop edge scissors
- Awl
Note: I used 100% Wool Craft Felt, but this project will also work with The Felt Store's Premium Wool Blend or Acrylic Craft Felt in the colours of your choice.
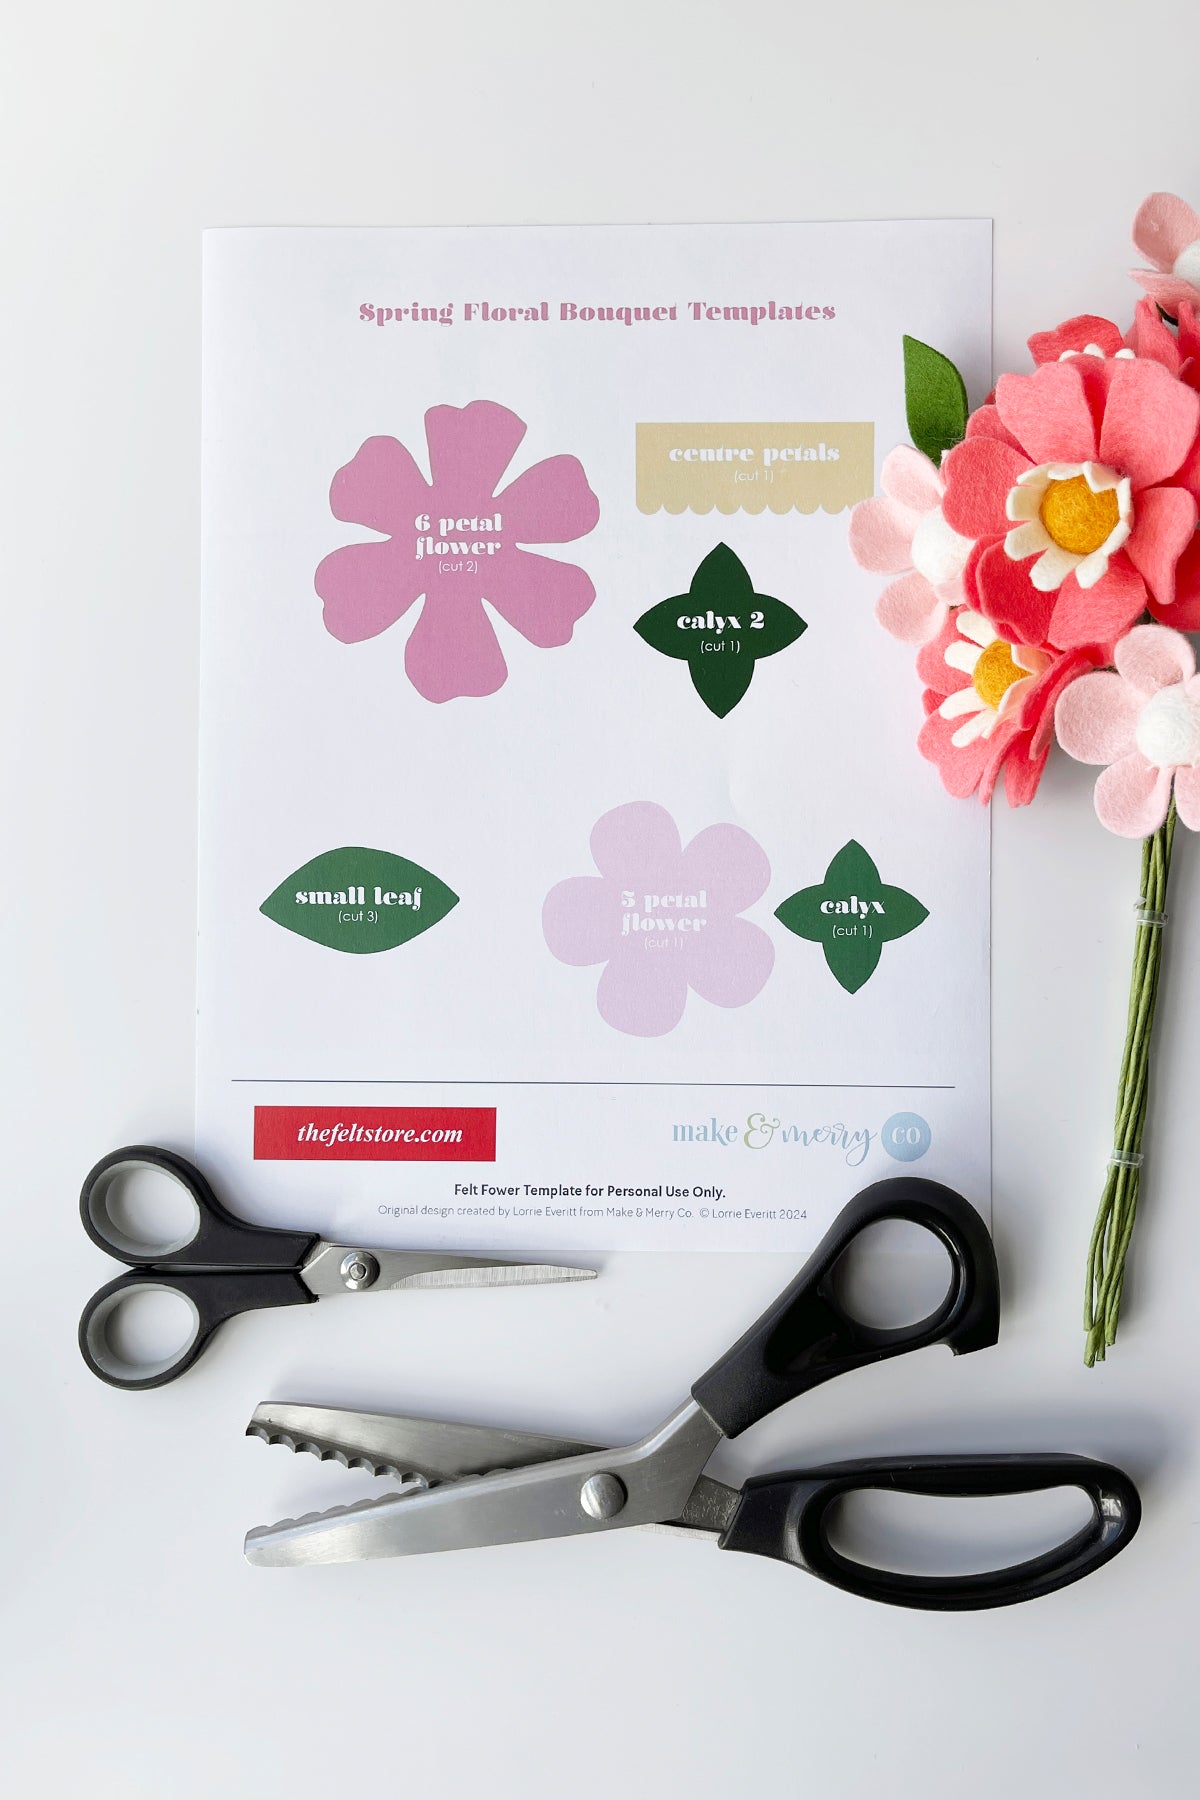
You will also need to download my free felt flower template here.
Let’s get started:
Print out the template on standard 8.5 x 11” paper, size as is.
For my bouquet I made three each fantasy flowers, the Glady Blossom and the Simple 5-Petal flower, and one leafy stem. You can make as many flowers and leafy stems as you wish to create your own bouquet.

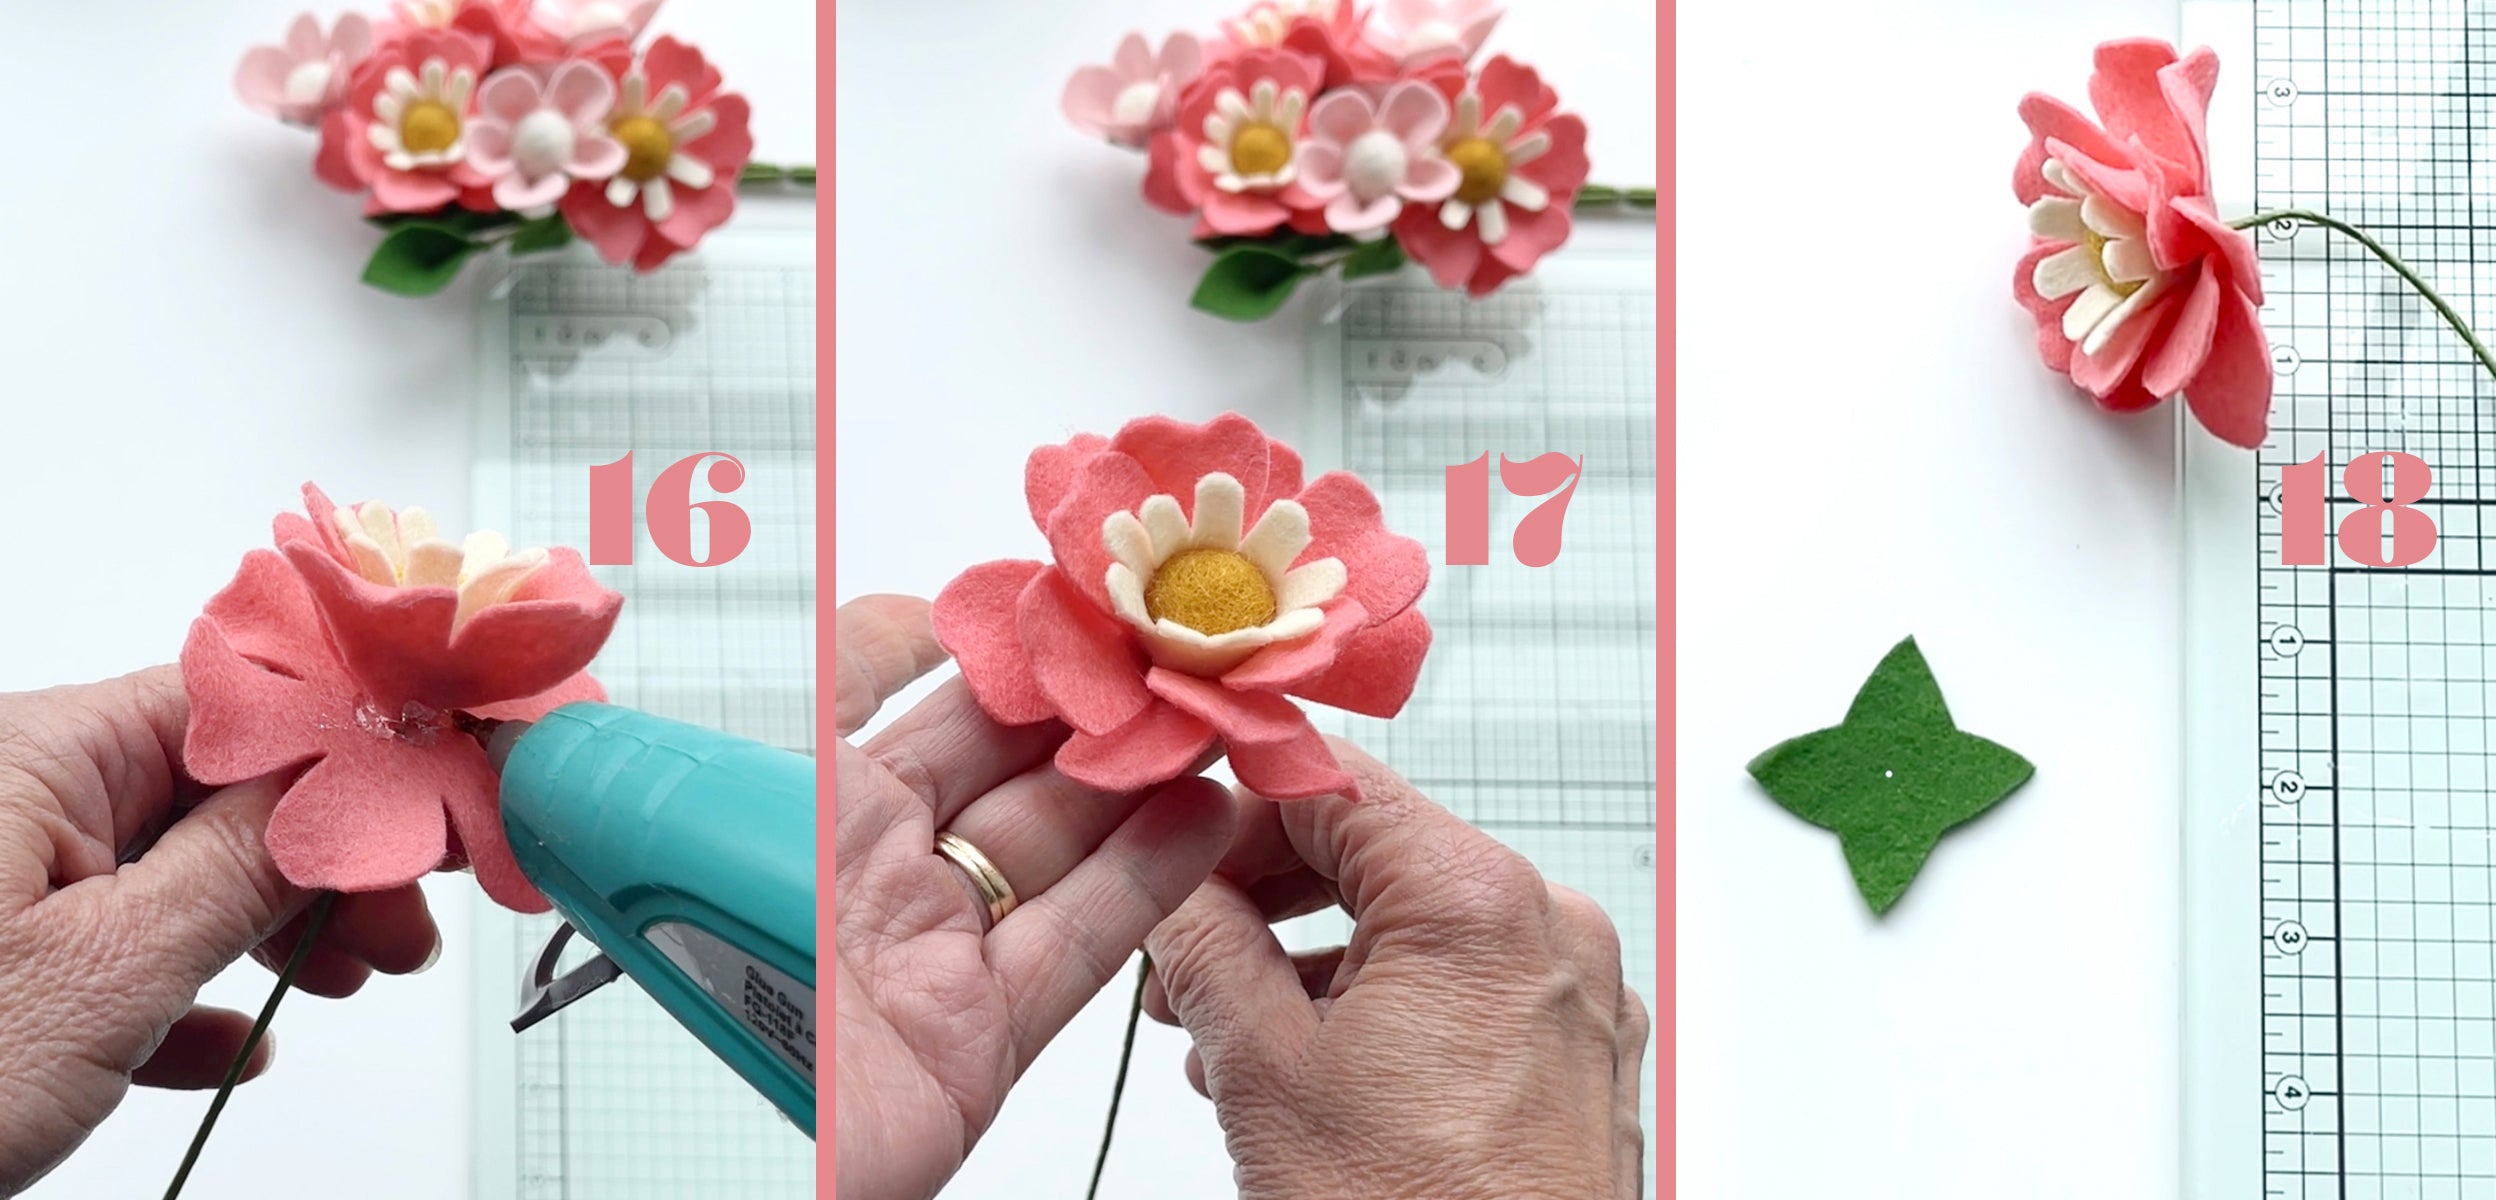
Let’s make the Gladys Blossom flower:
-
To make this flower, you will use the 6-petal flower, centre petal & calyx 2 templates. You will also need coral, cream & moss felt, and one mini gold wool felt ball for each flower. Cut out all of the felt shapes.
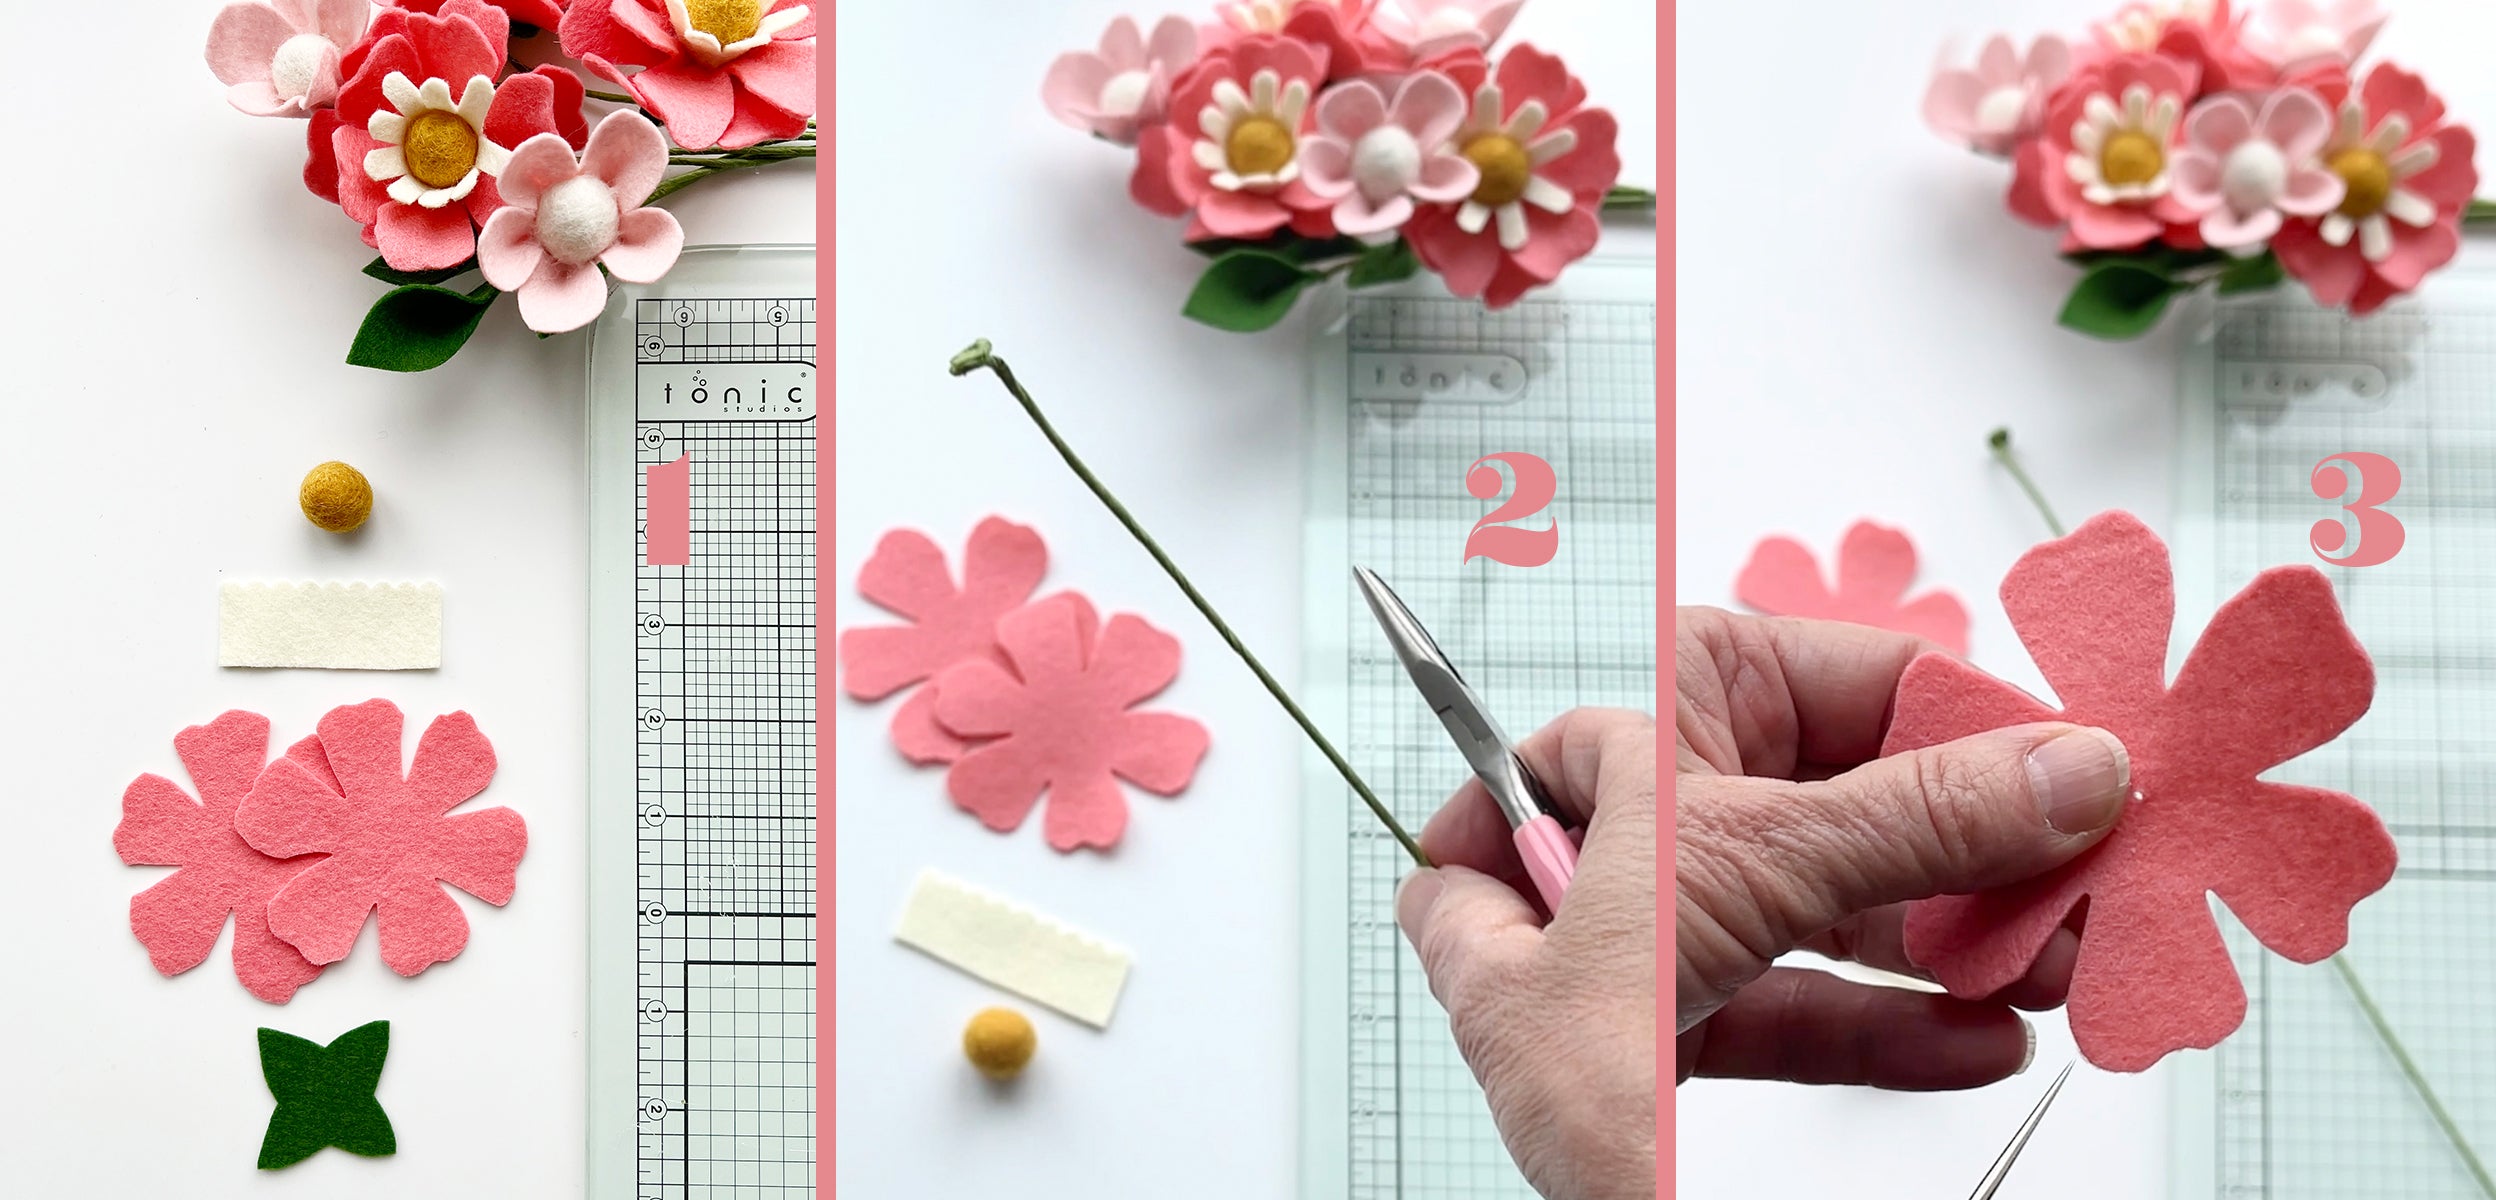
Note: I found it easier to cut the centre petals using 7mm scallop scissors. - Prepare the 18-gauge wrapped floral wire using pliers. Twist one end of the wire to create a circular wire base and then bend and angle the wire as shown.
- Use an awl (or pointy scissors) to create a small hole in the centre of the 6-petal shapes. The hole needs to be large enough to fit the floral wire.
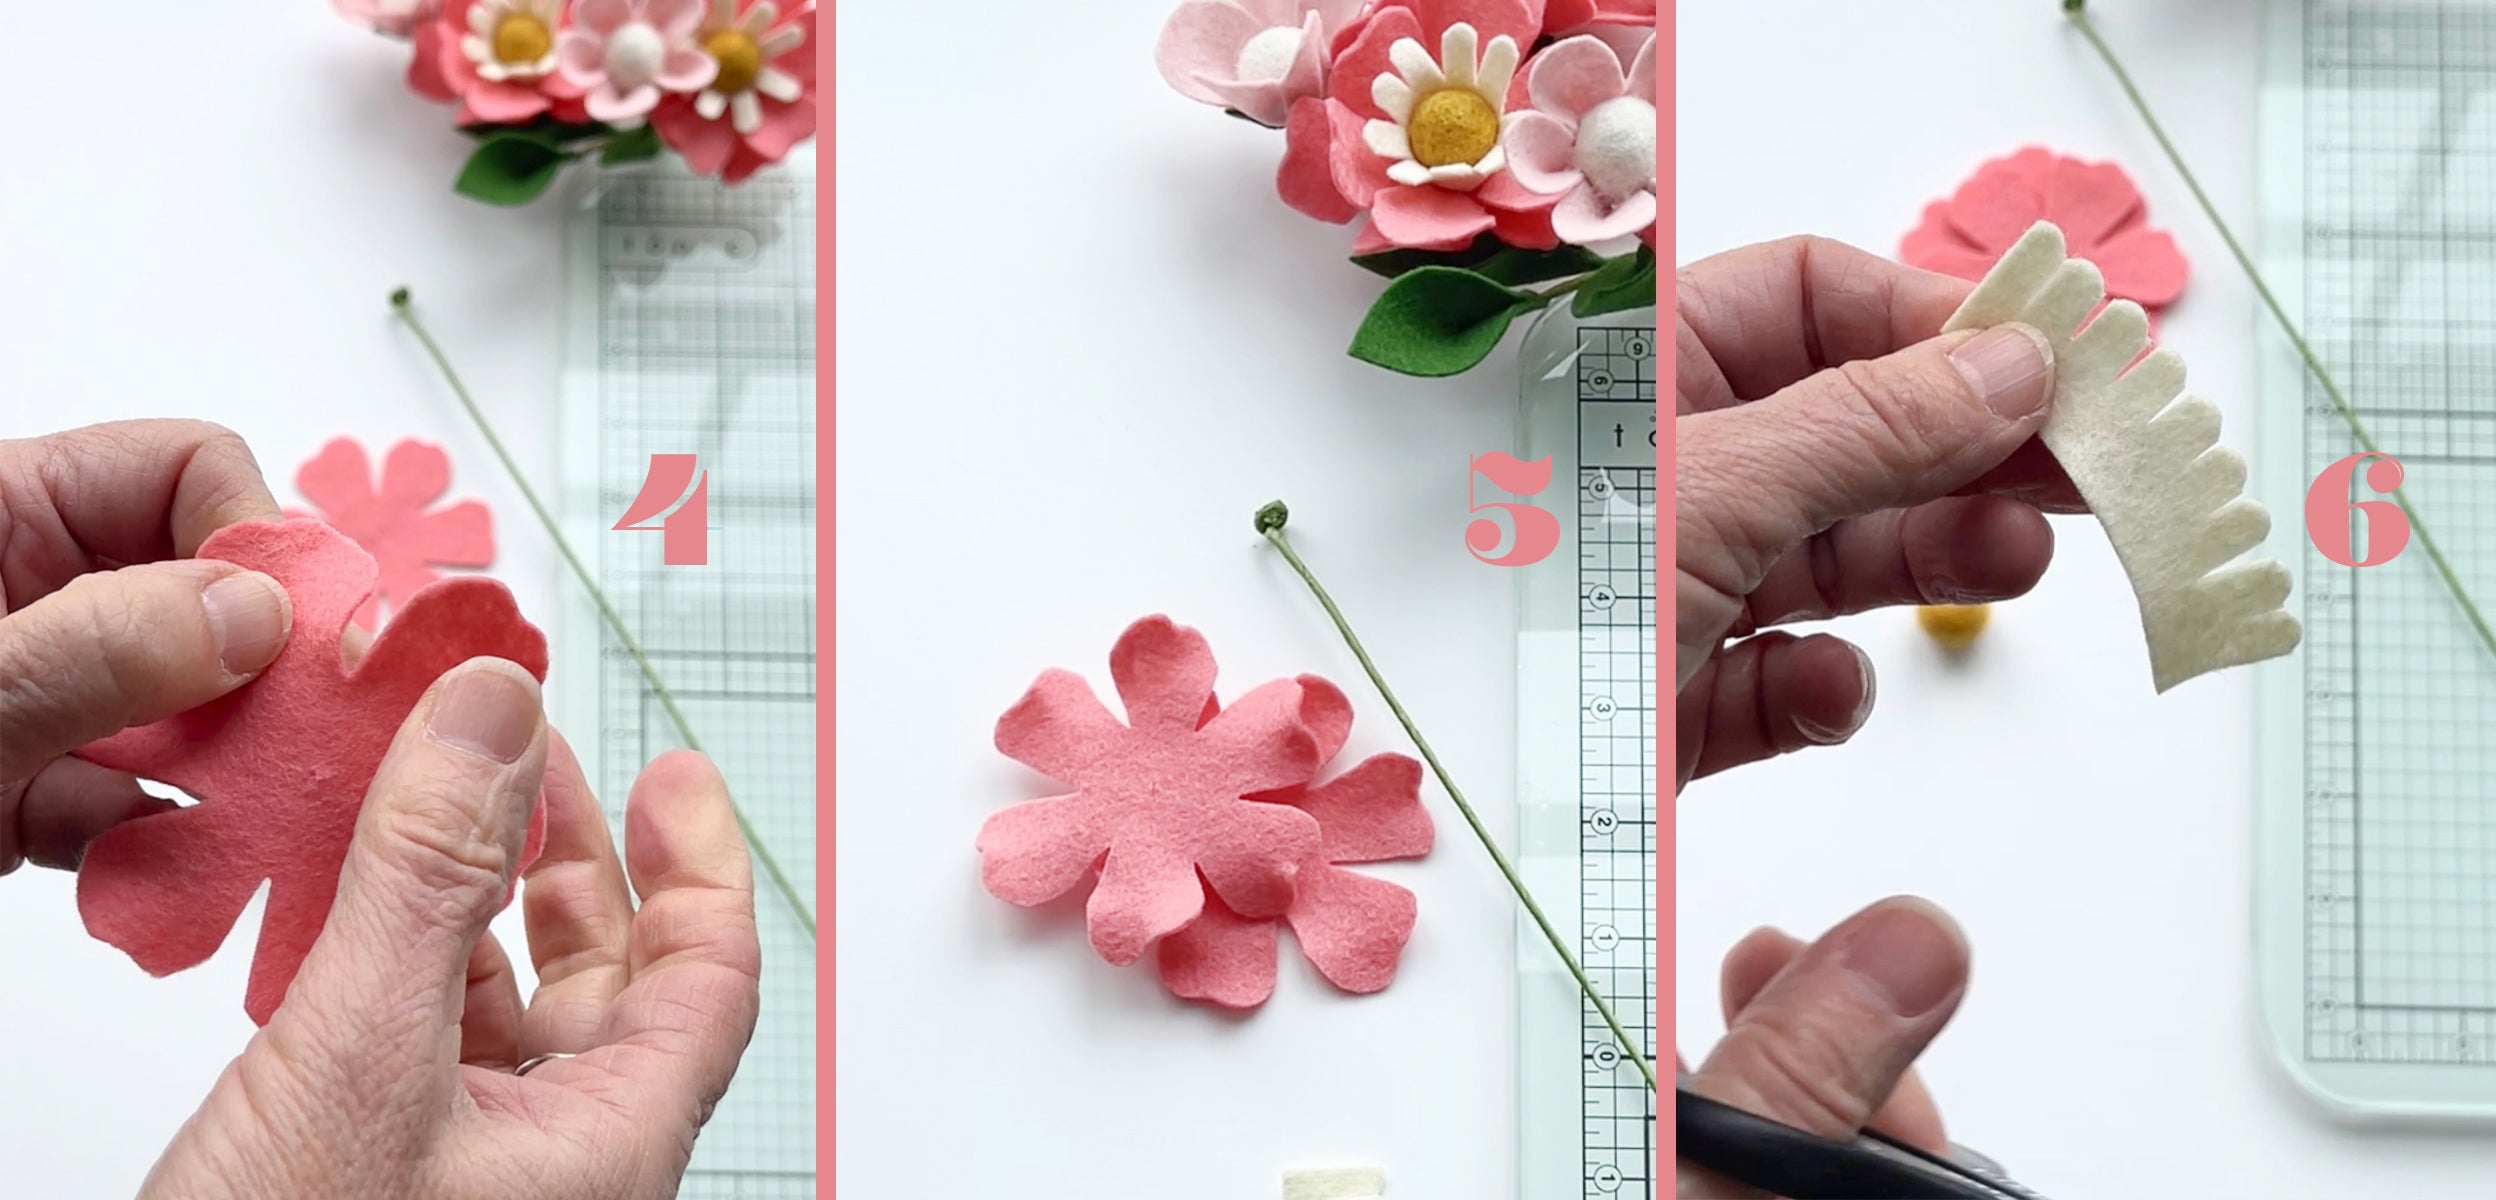
- Add shape to the petals by stretching and twisting each one.
- Add shape to both of 6-petal flower pieces and set aside when complete.
- Cut the space between the curves of the centre petals as shown to create the small petals.
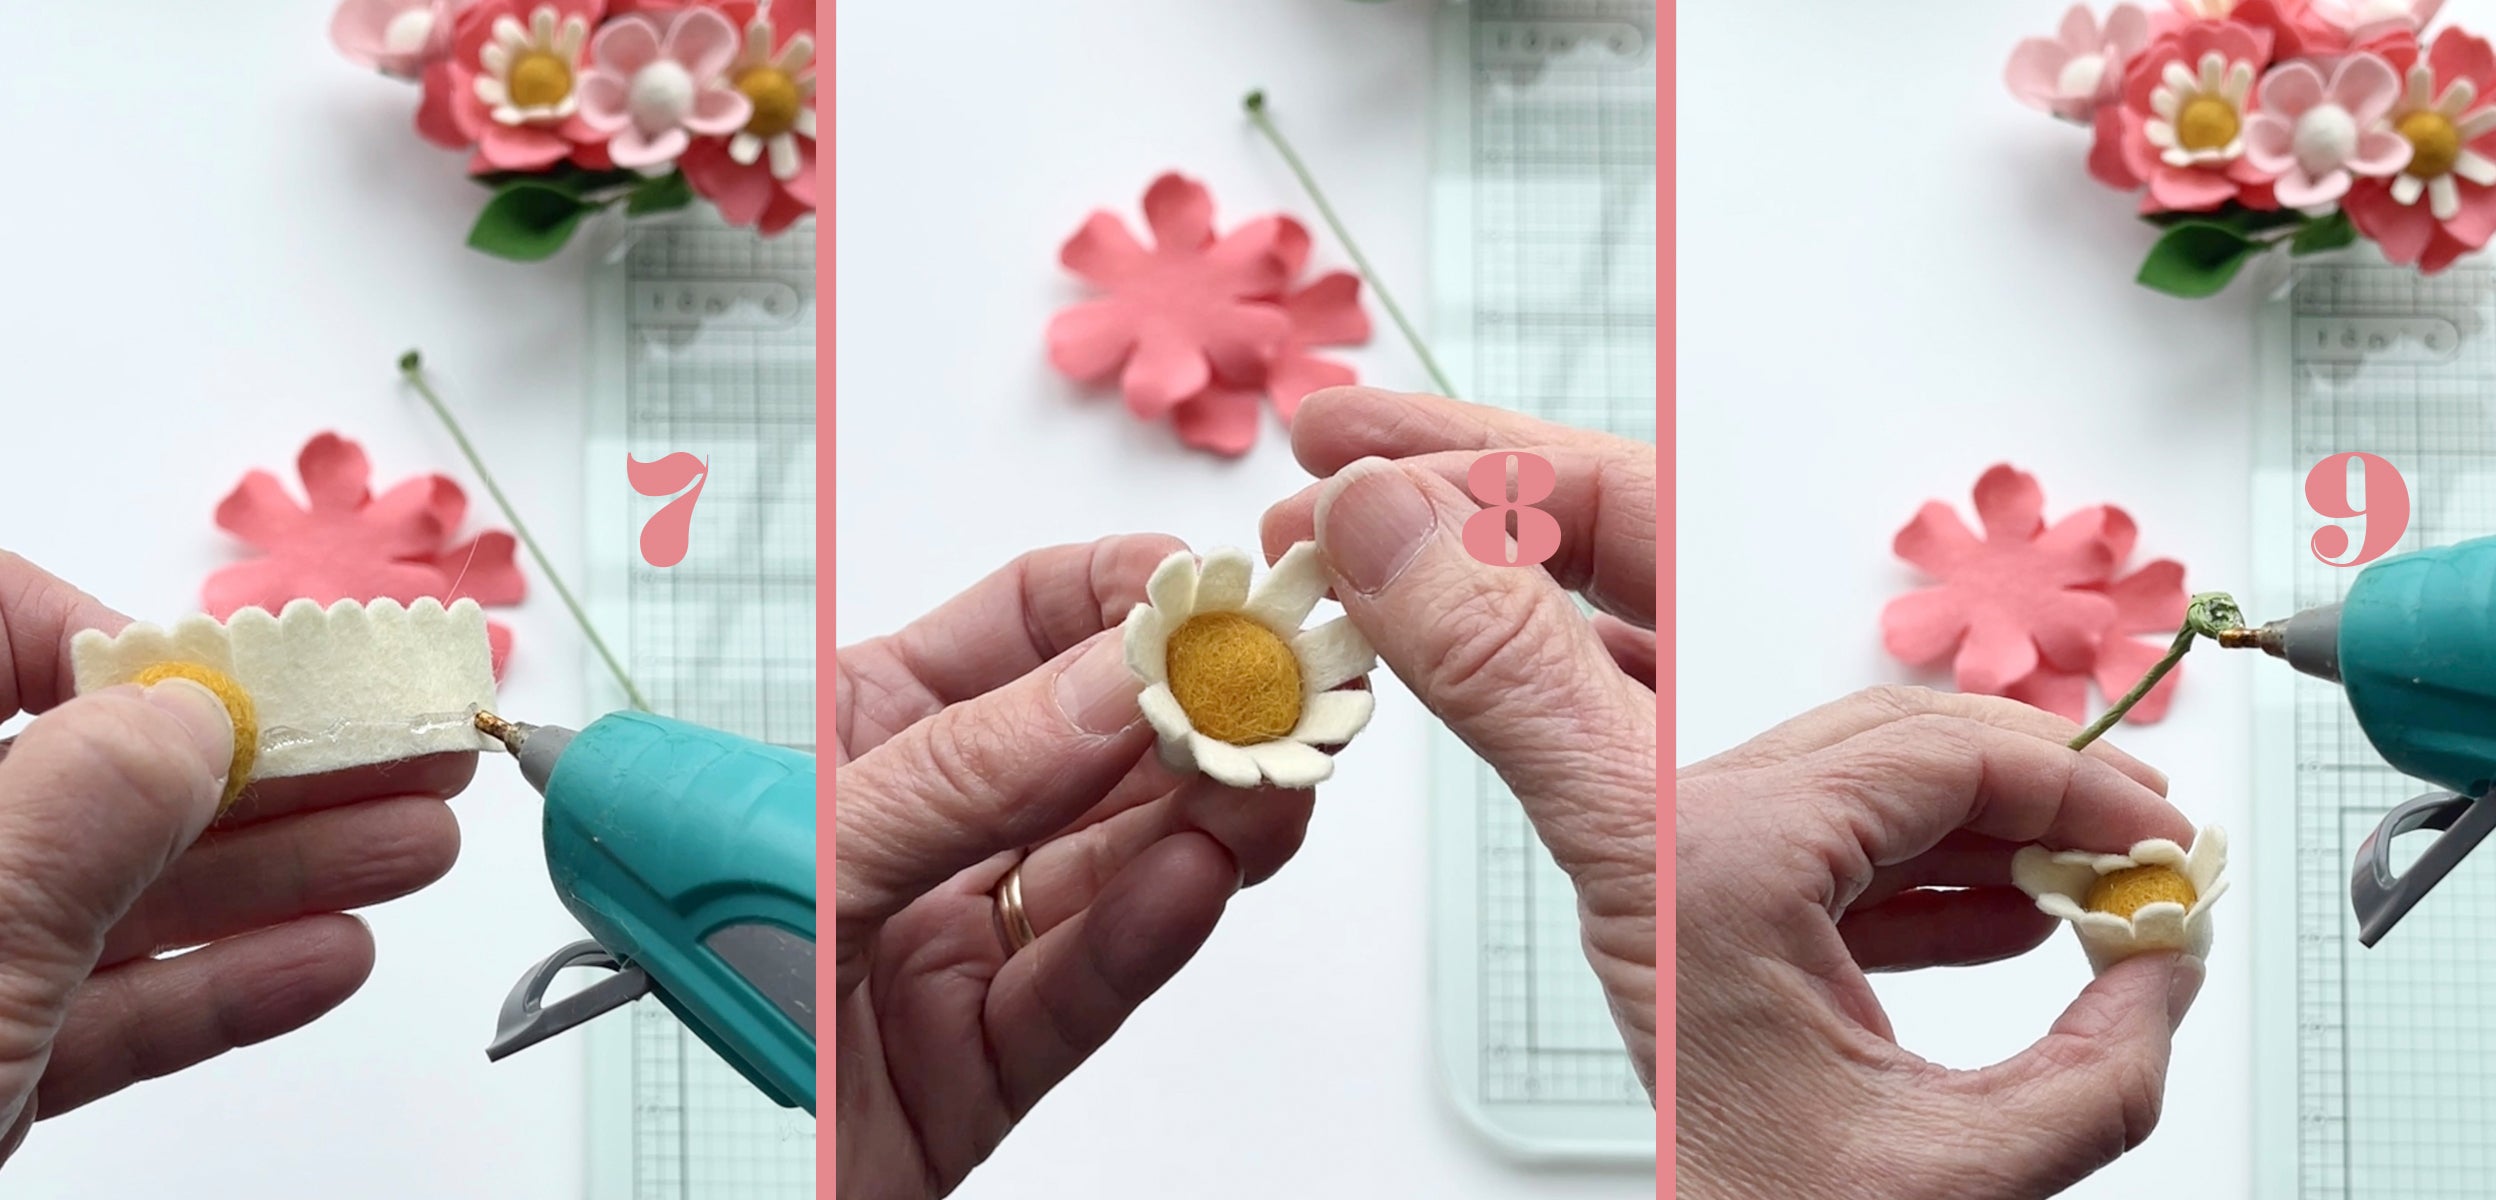
- Add a small dab of glue to the uncut edge of the centre petals and adhere it to the mini gold felt ball. Continue adding glue as shown and roll the mini felt ball until the ends of the centre petals meet.
- Hold until the glue is dry and then pull the petals back slightly.
- Add a generous amount of hot glue to the flat top of the floral wire stem.
- Attach the bottom of the mini felt ball to the wire stem as shown and hold in place until the glue is dry.
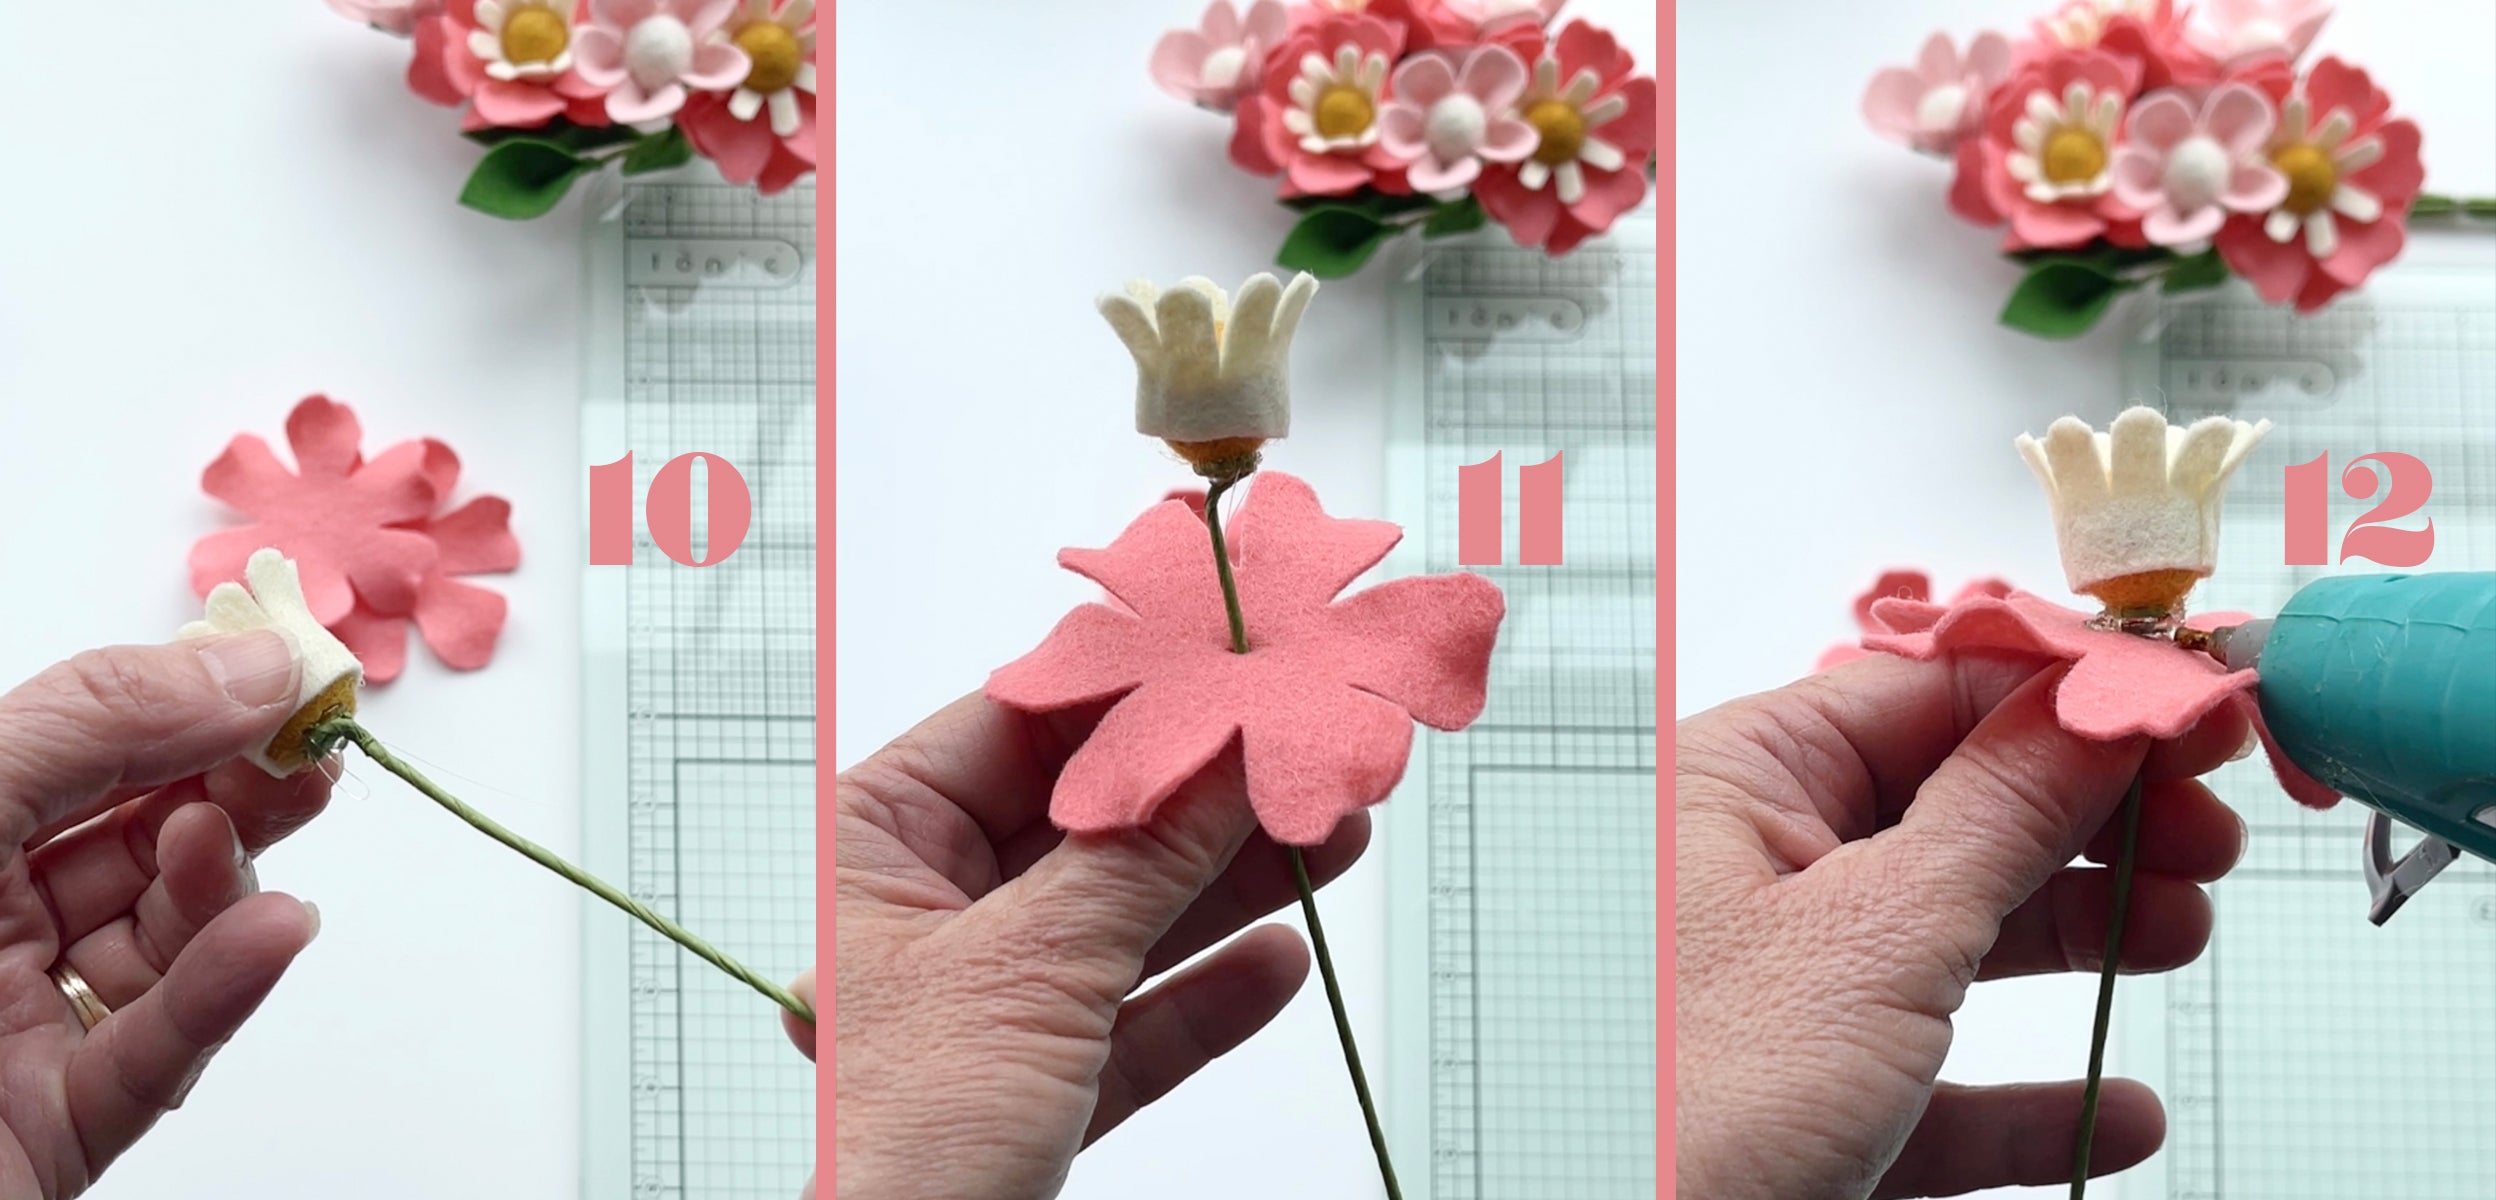
- Insert the floral wire into the hole of one of the 6-petal flowers.
- Add a generous amount of hot glue between the felt ball and the floral petal and squeeze together.
- Add more glue to the base of the cream centre petals and,
- Pull each of the six petals up and around and hold in place until the glue is dry.
- Insert the floral wire into the hole of the second 6-petal flower.
- Arrange the petals so the flower will look full and add glue as shown to keep it in place.
- Hold until the glue is dry.
- Add a hole to the centre of the calyx 2 so it can be added to the floral wire stem.
- Glue the calyx 2 to the back of the flower.
- Hold in place until dry.
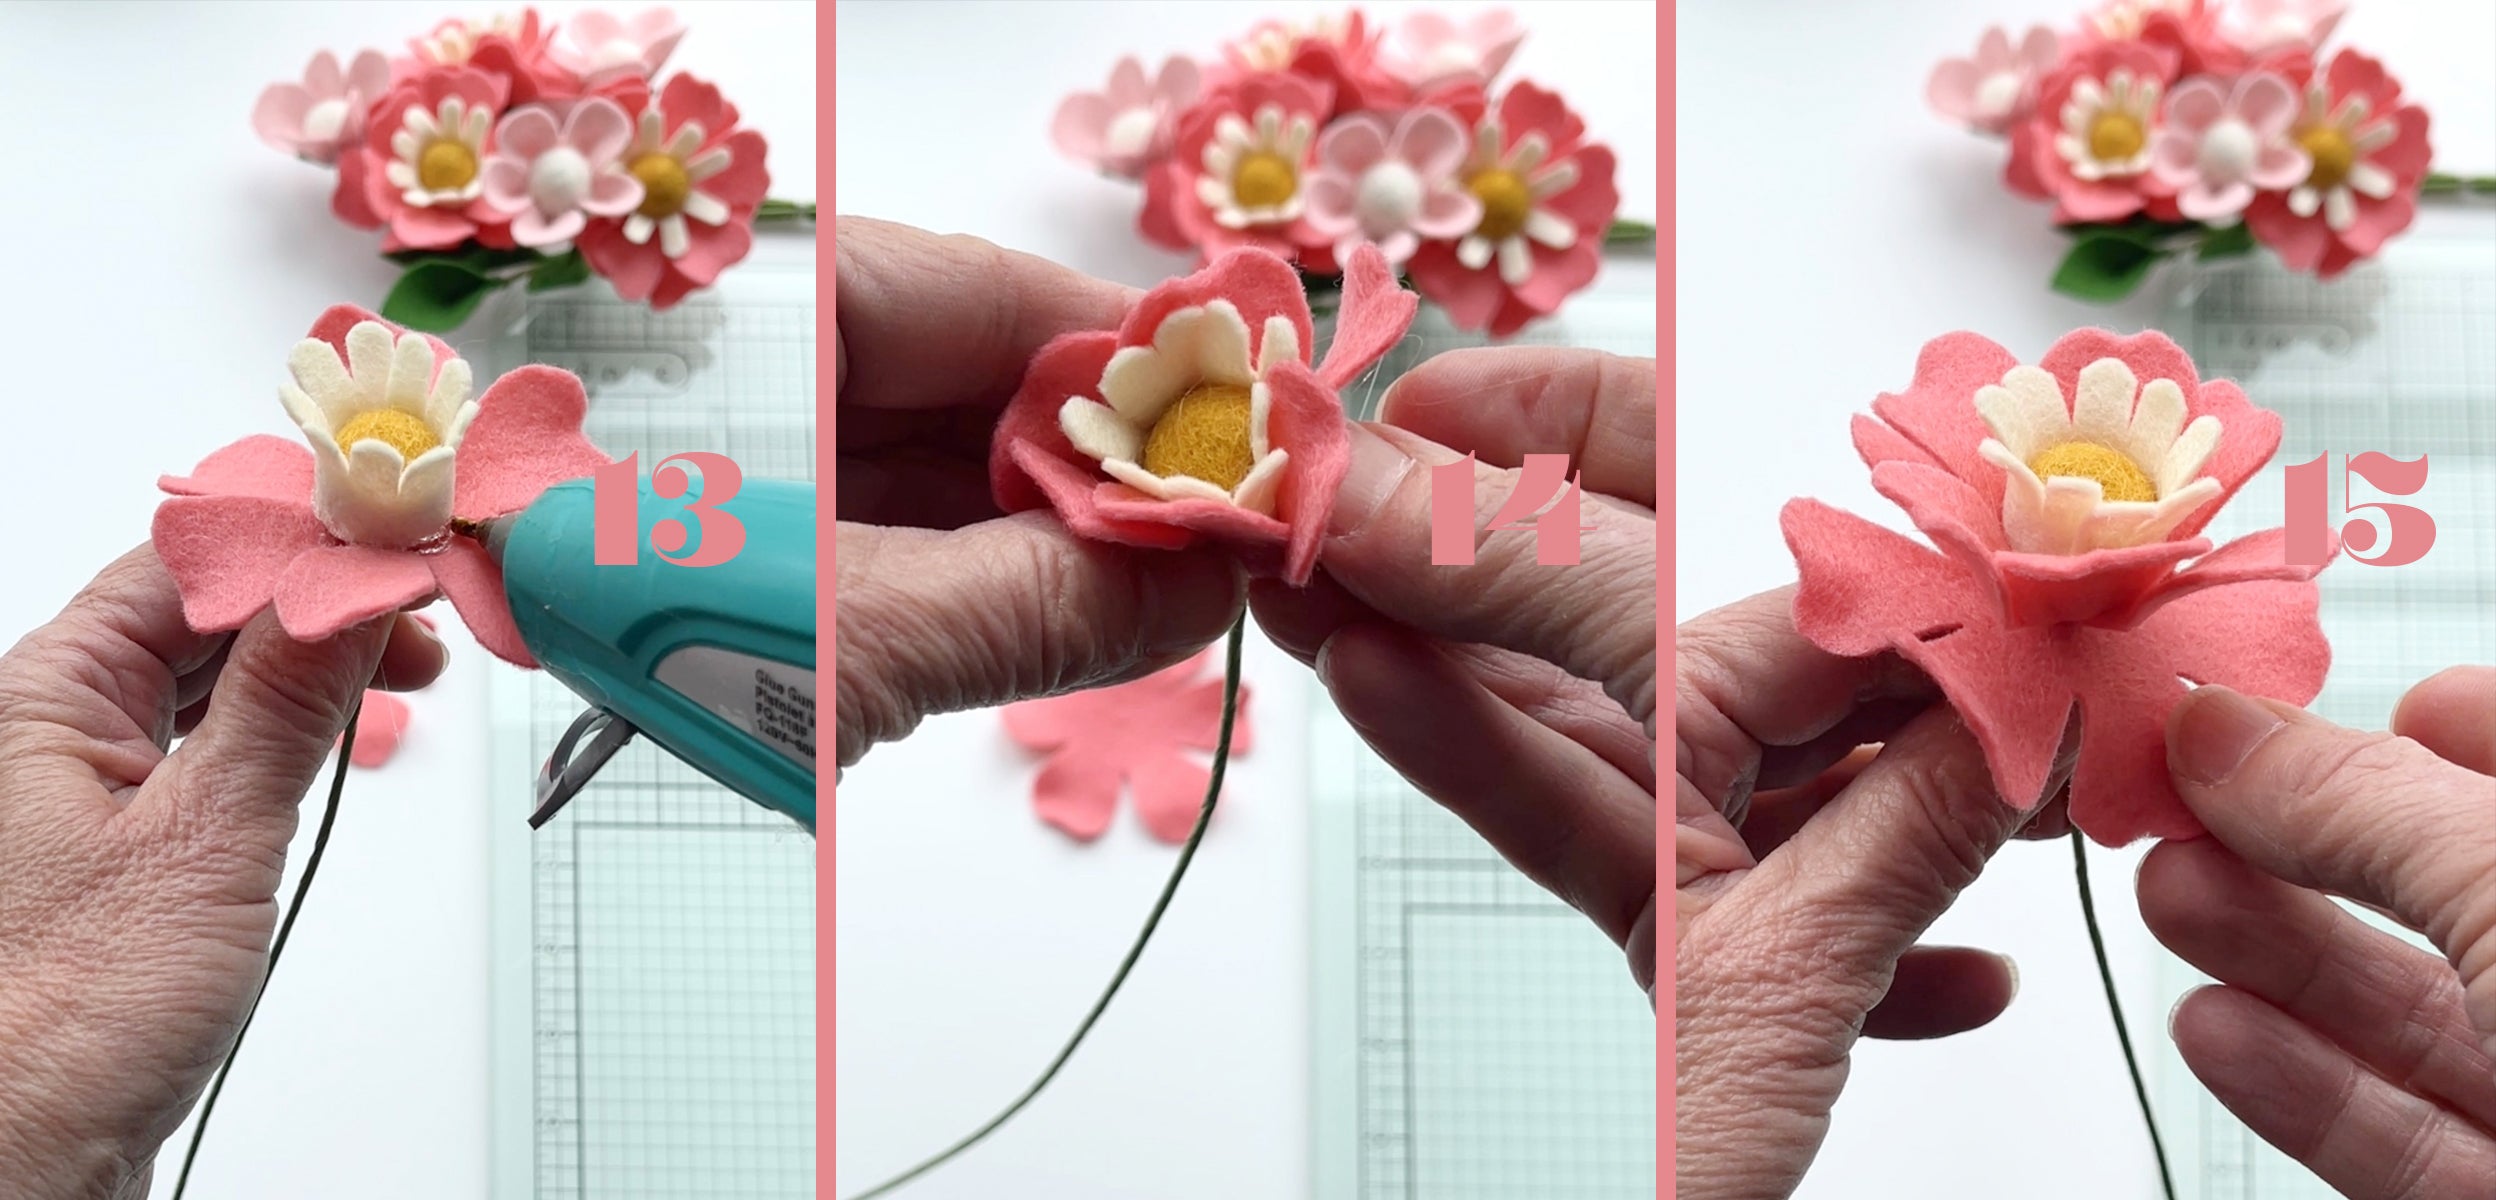
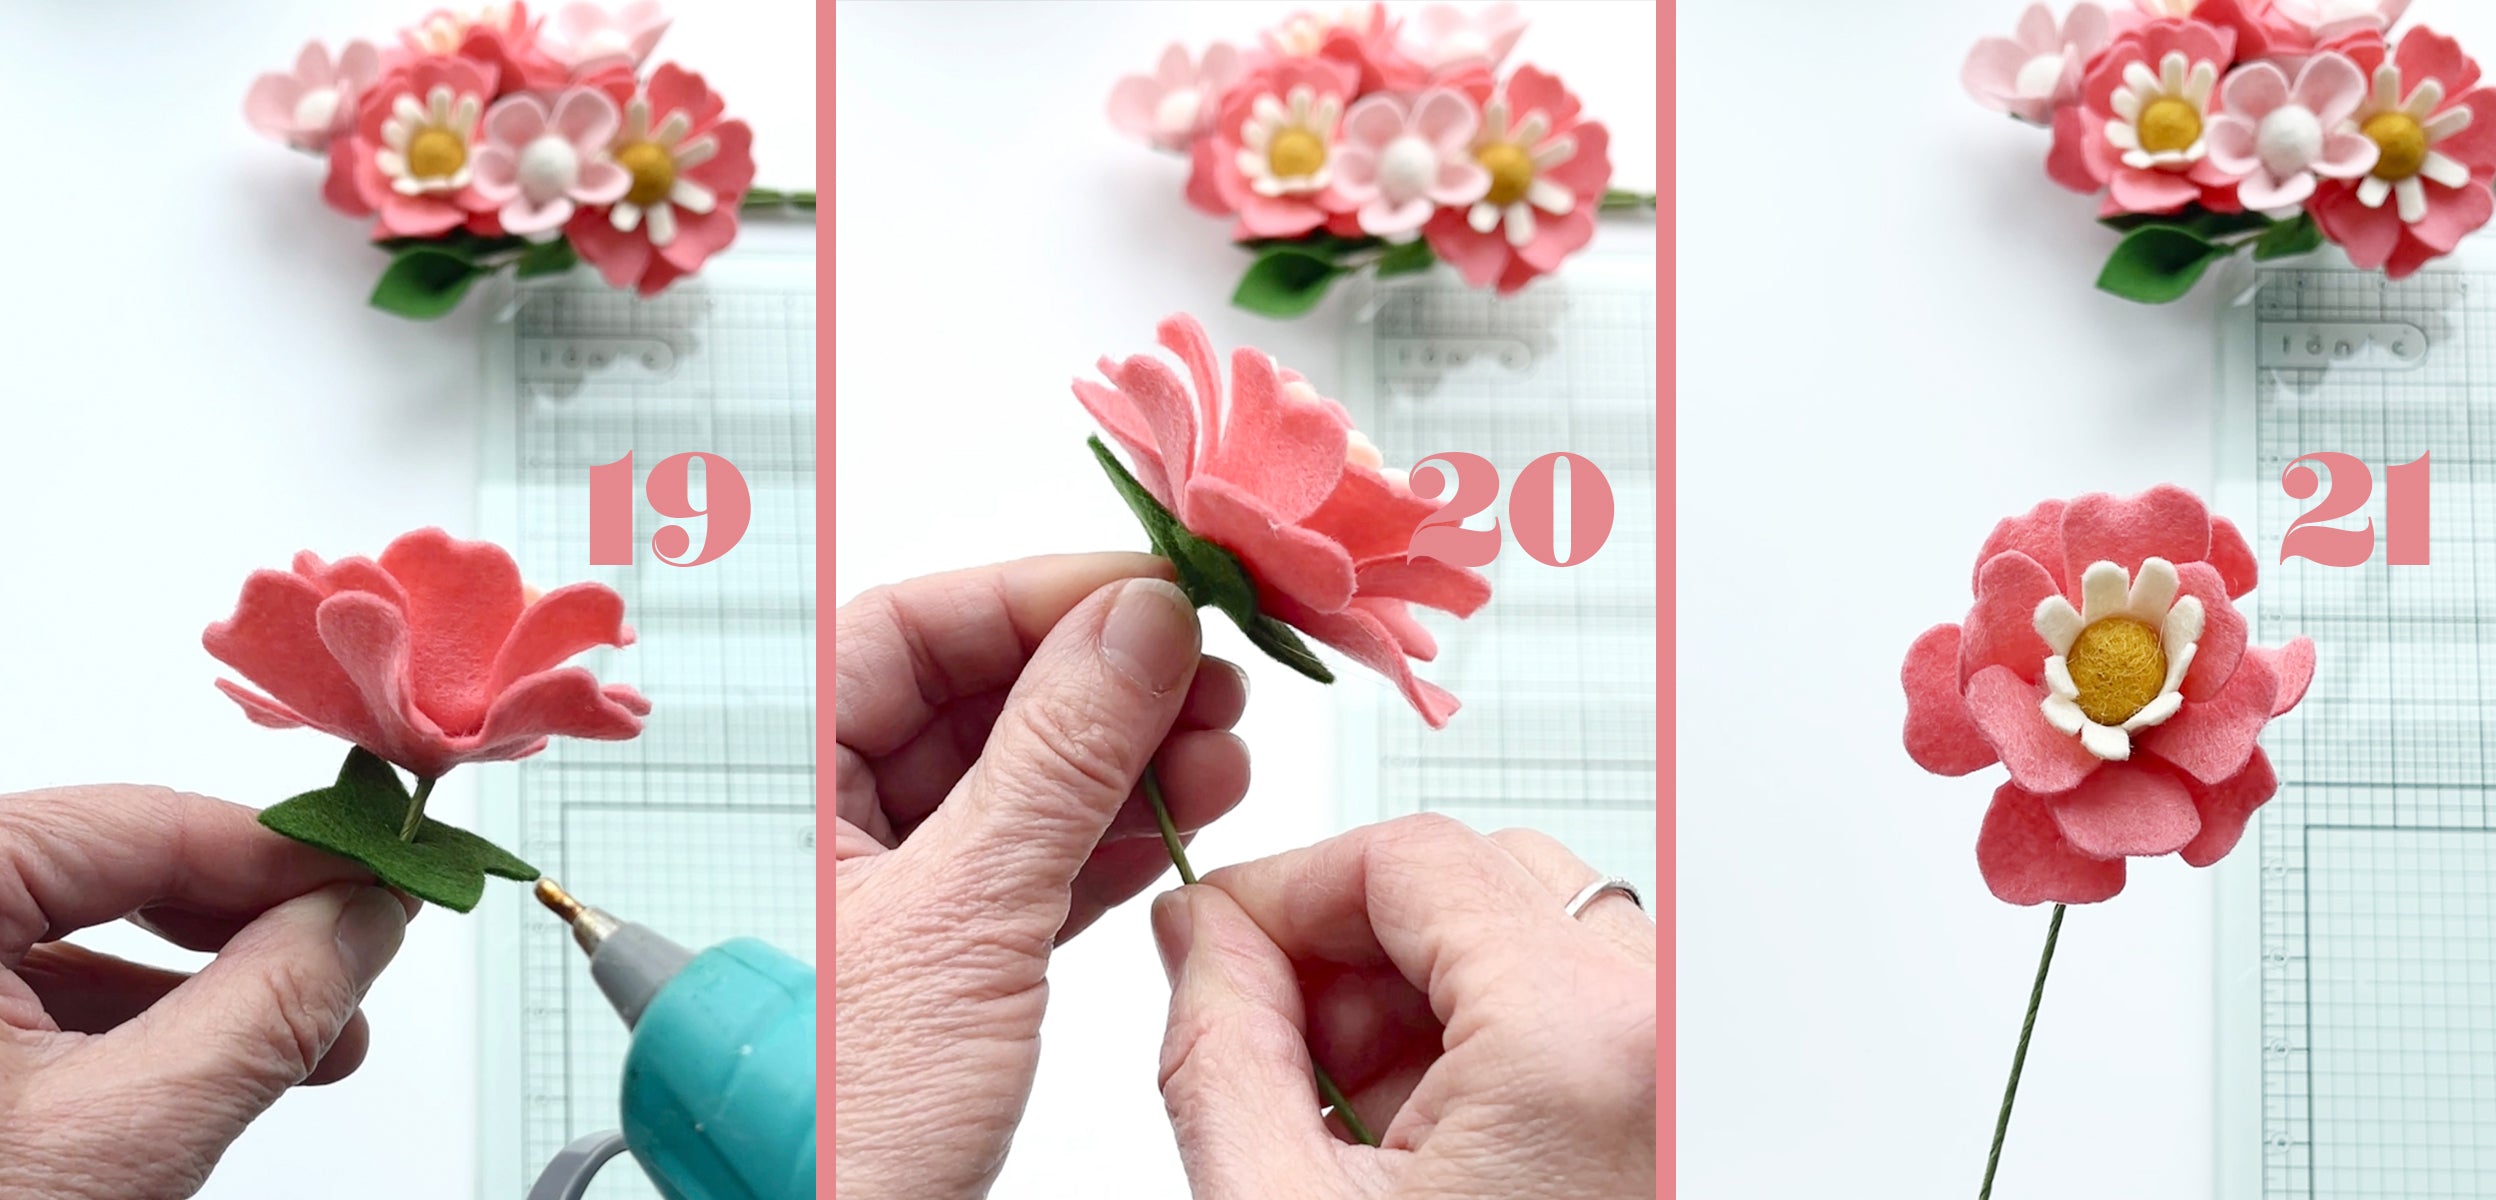
- The first Gladys Bloom is complete. Repeat to make as many of these happy flowers as you wish for your bouquet.
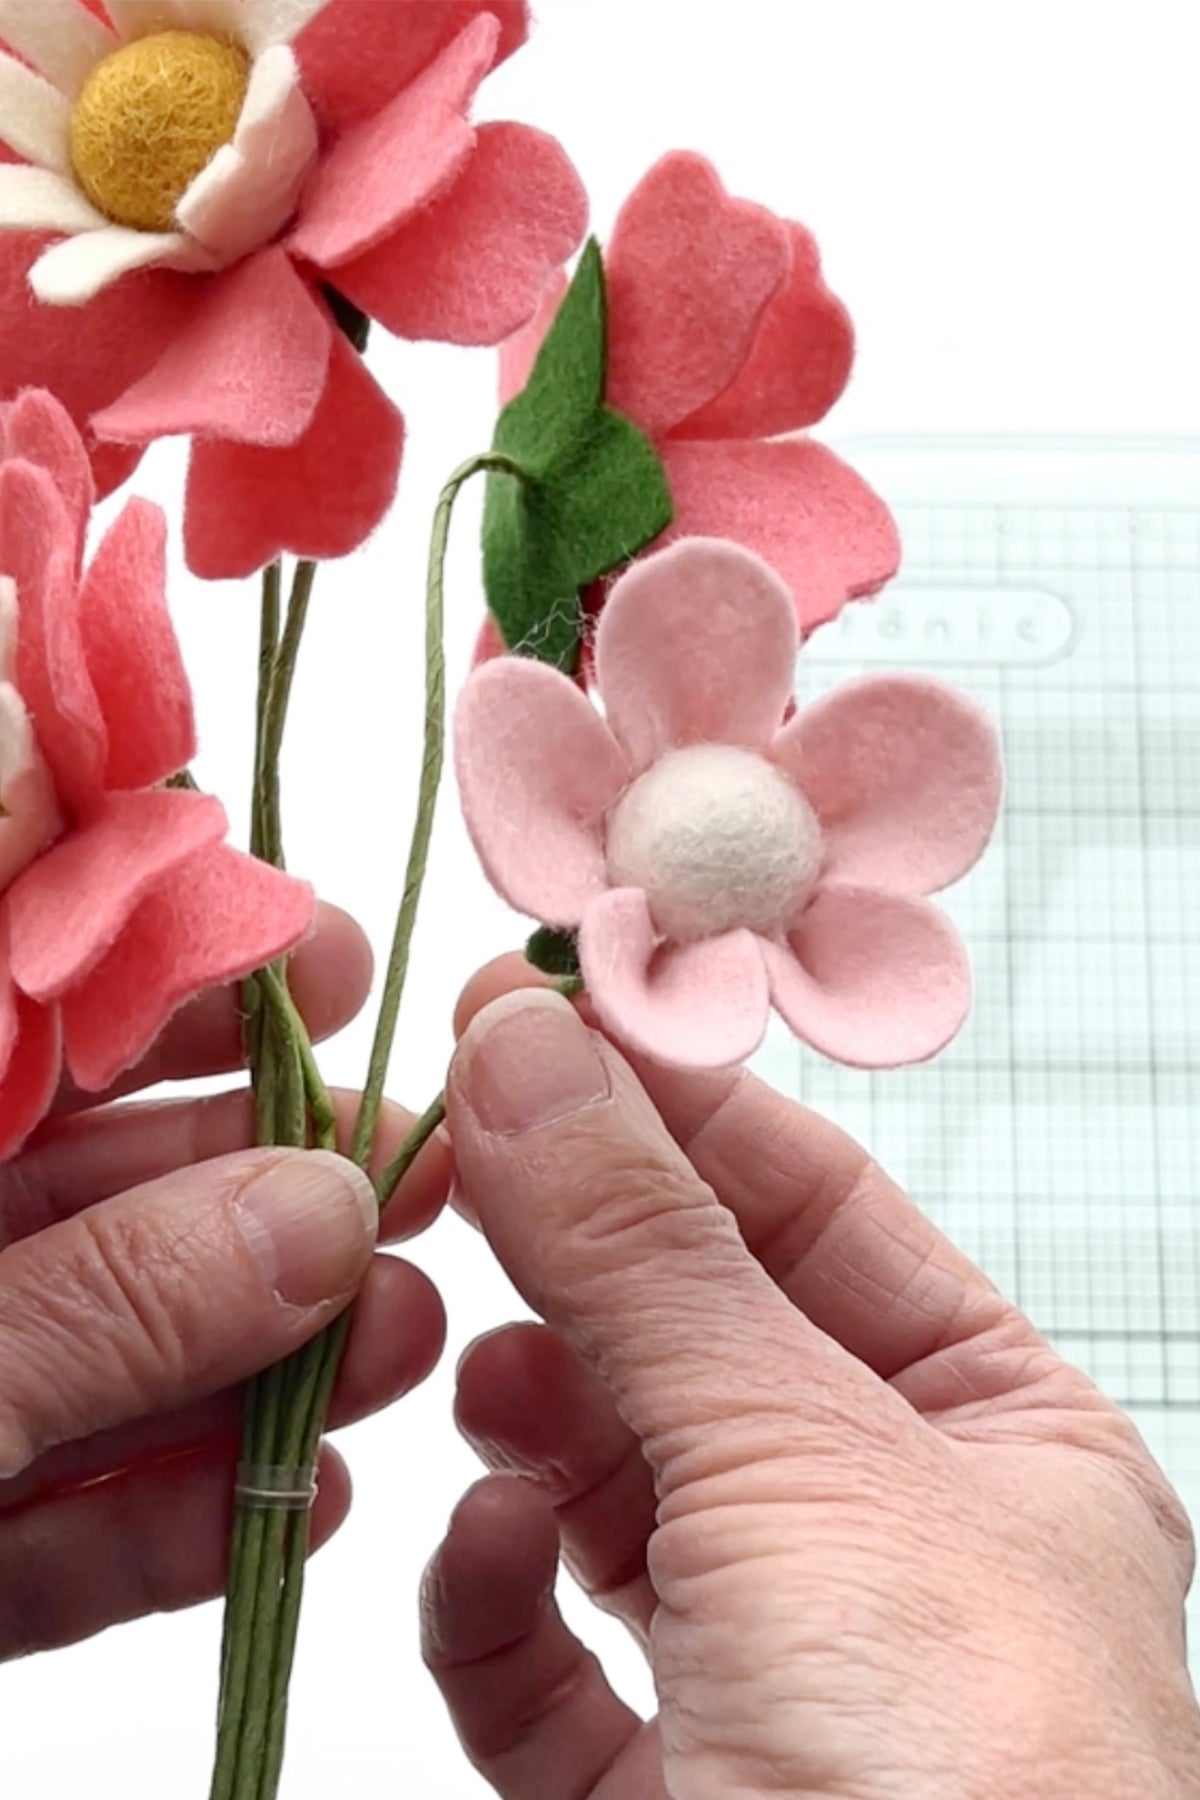
Let’s make the Simple 5-Petal flower:
- To make this flower, you will use the 5-petal flower & calyx templates.
- You will find the DIY instructions for my simple 5-petal flower in this post. The only modification to the original instructions is that you will need to add a floral wire stem and calyx*.
Refer to the Gladys Bloom instruction. Step 2 - how to prepare the floral wire. Steps 9 and 10 - how to attach the floral wire to the flower. Step 18 to 20 - how to add the calyx.
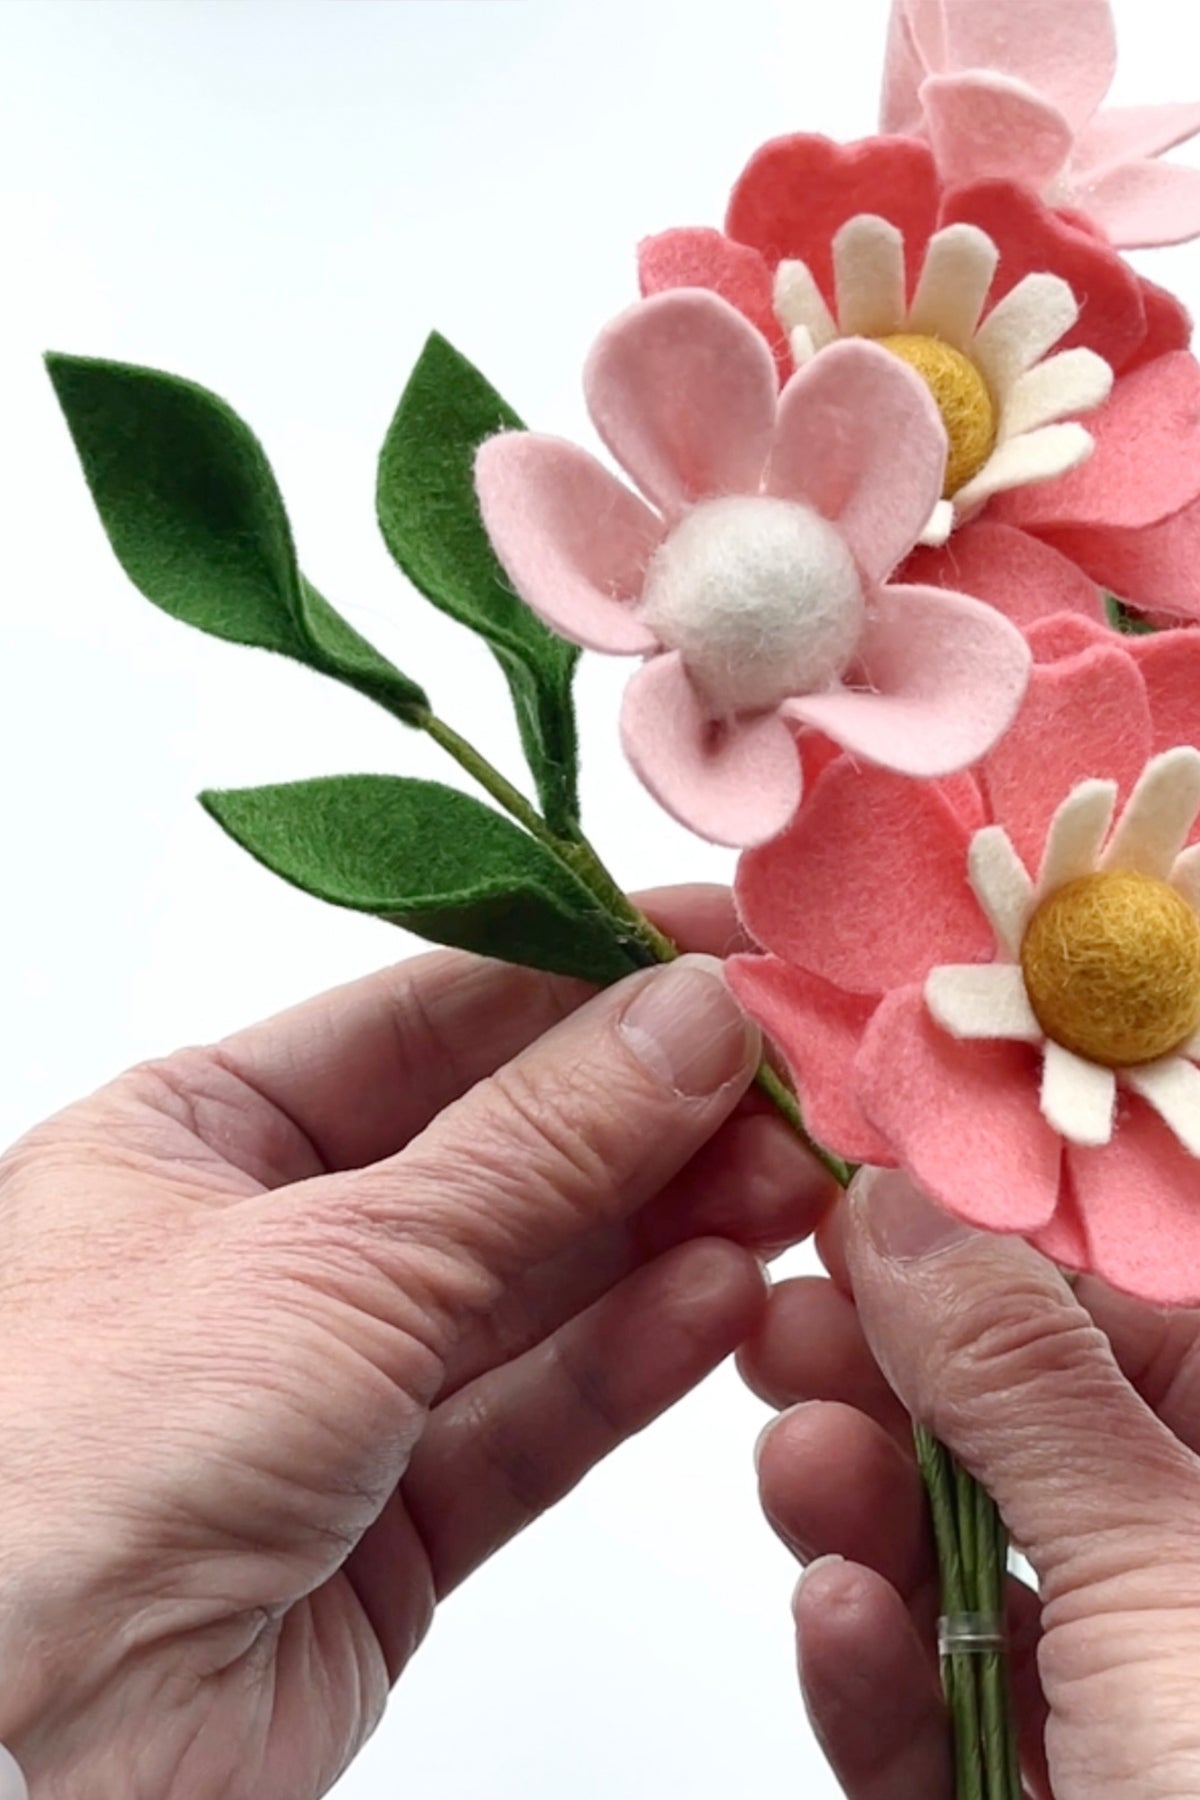
Let’s make the leafy stem:
You will find the DIY instructions for my leafy stem in this post.
Note: This bouquet is small, so I created my leafy stem using only three smaller leaves.
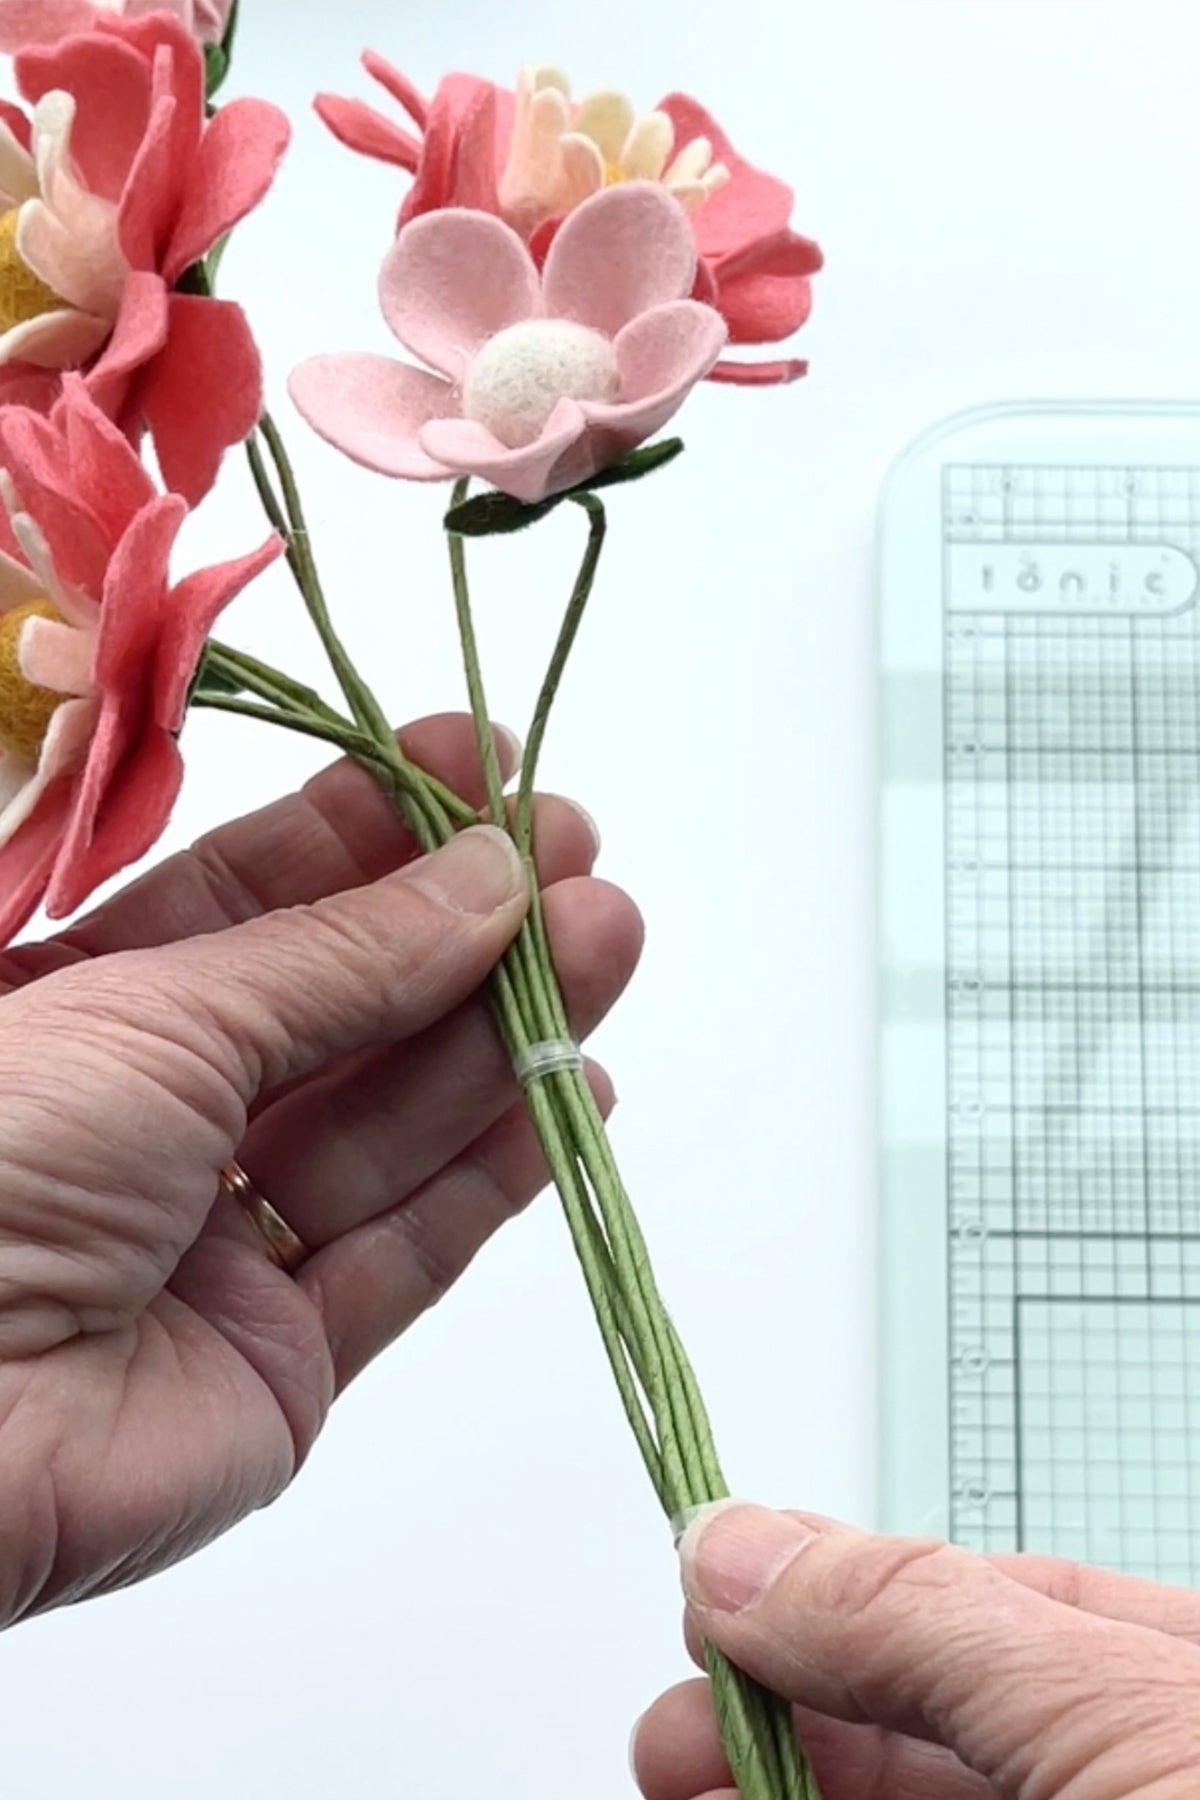
Let’s make the bouquet:
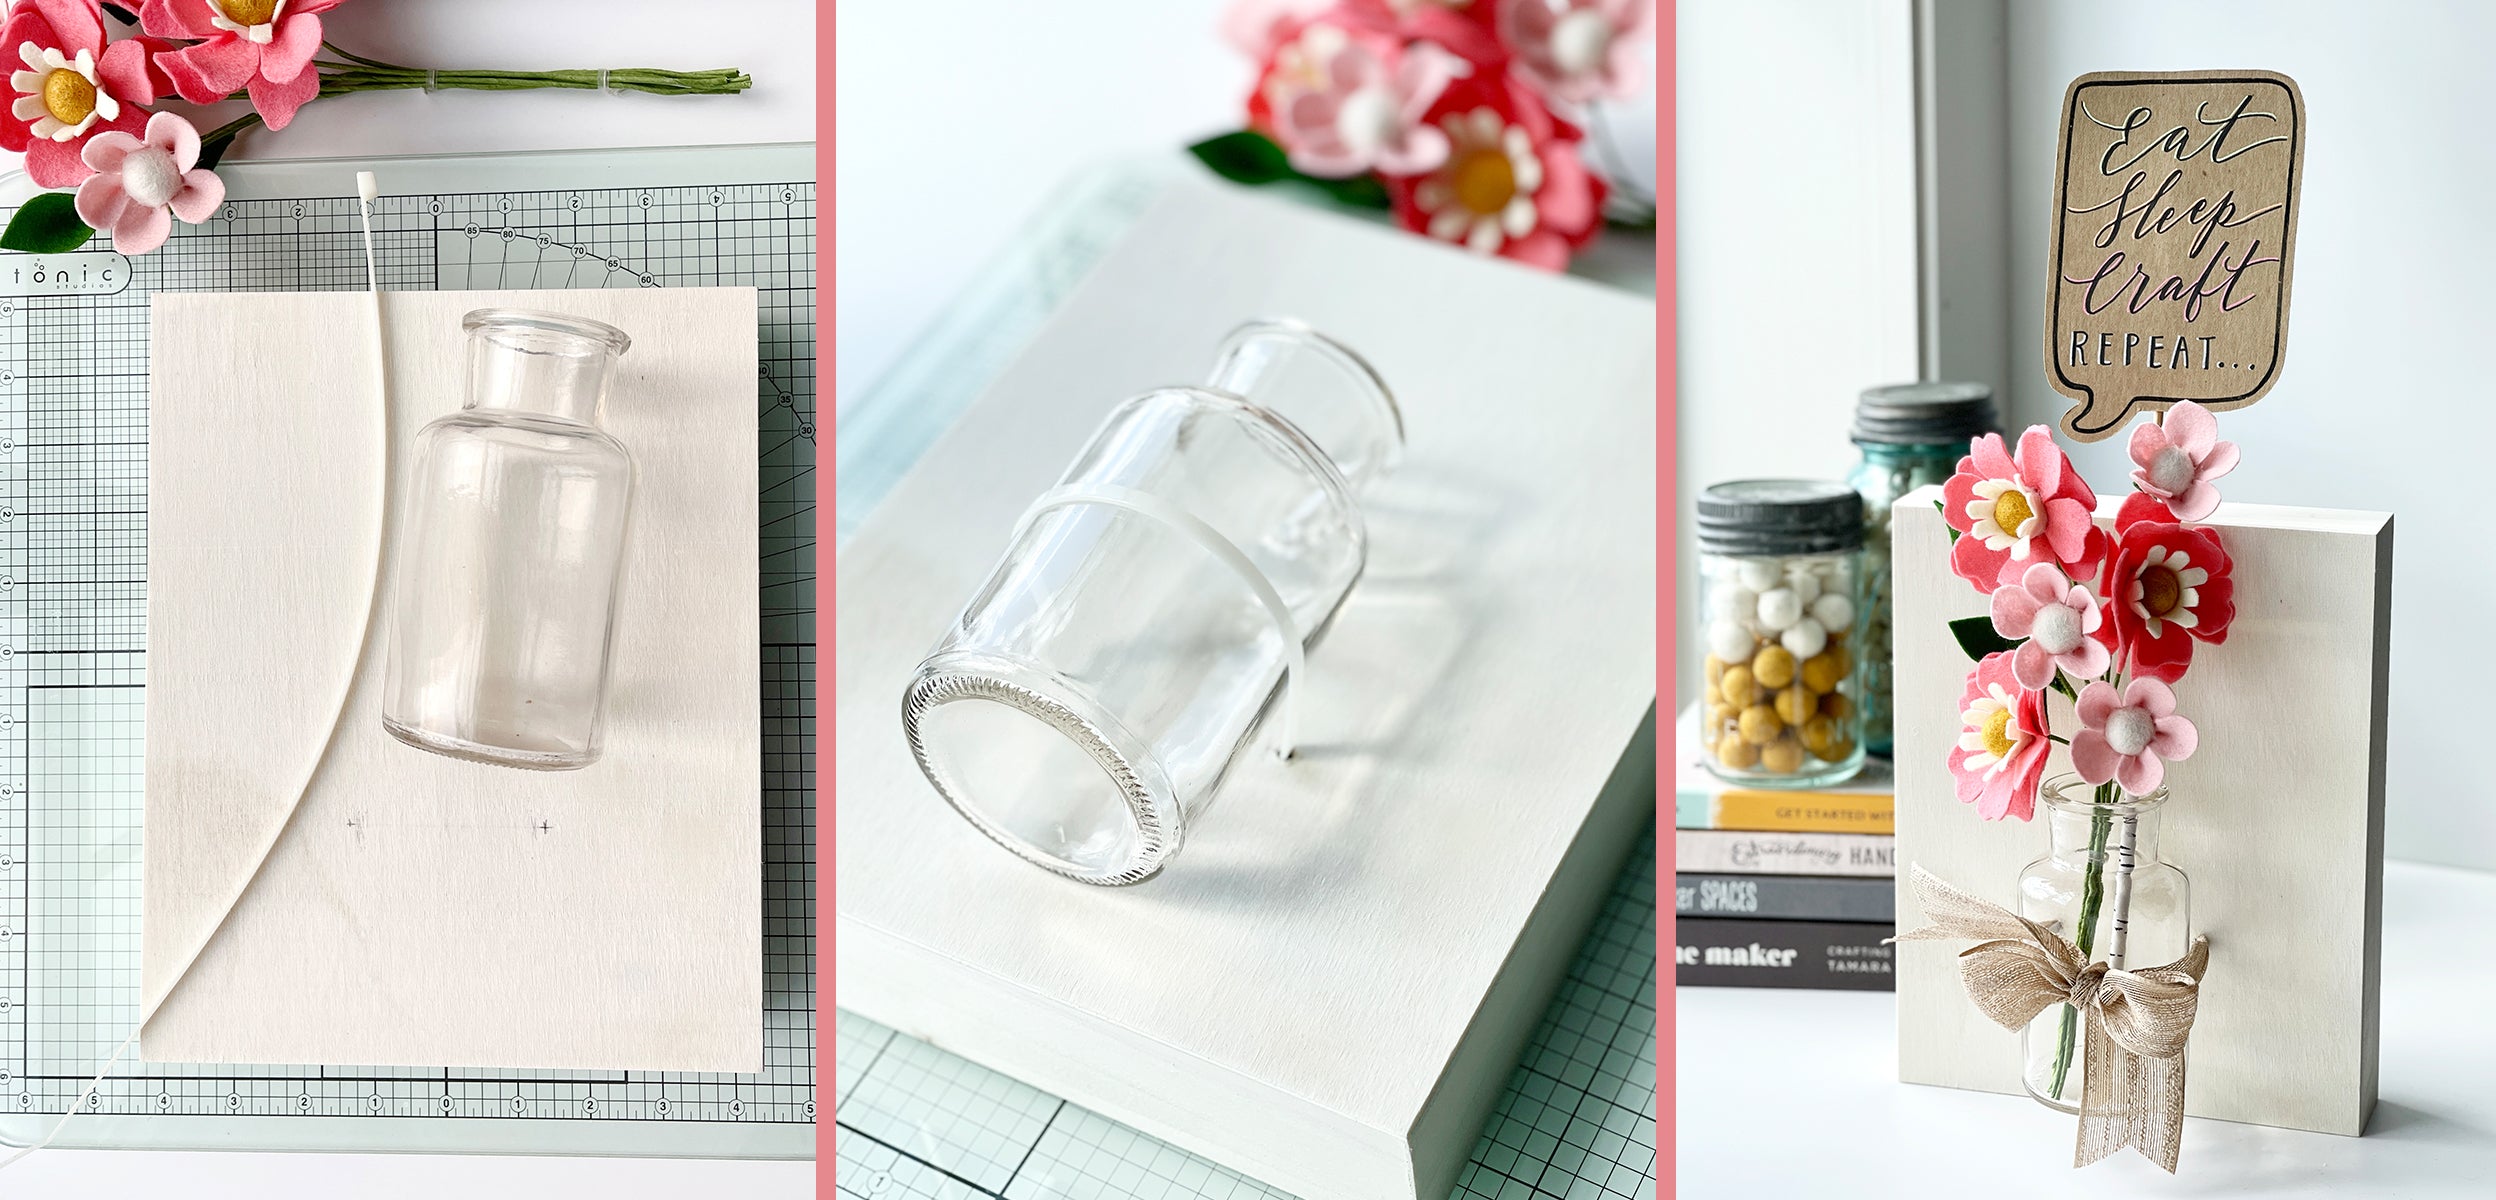
Arrange the flowers and leafy stem so they are visually appealing to you. Cut the bottom of the stems so they are the same size and the bouquet will fit nicely into your glass container. Two clear twist will come in handy to keep the flowers in place.
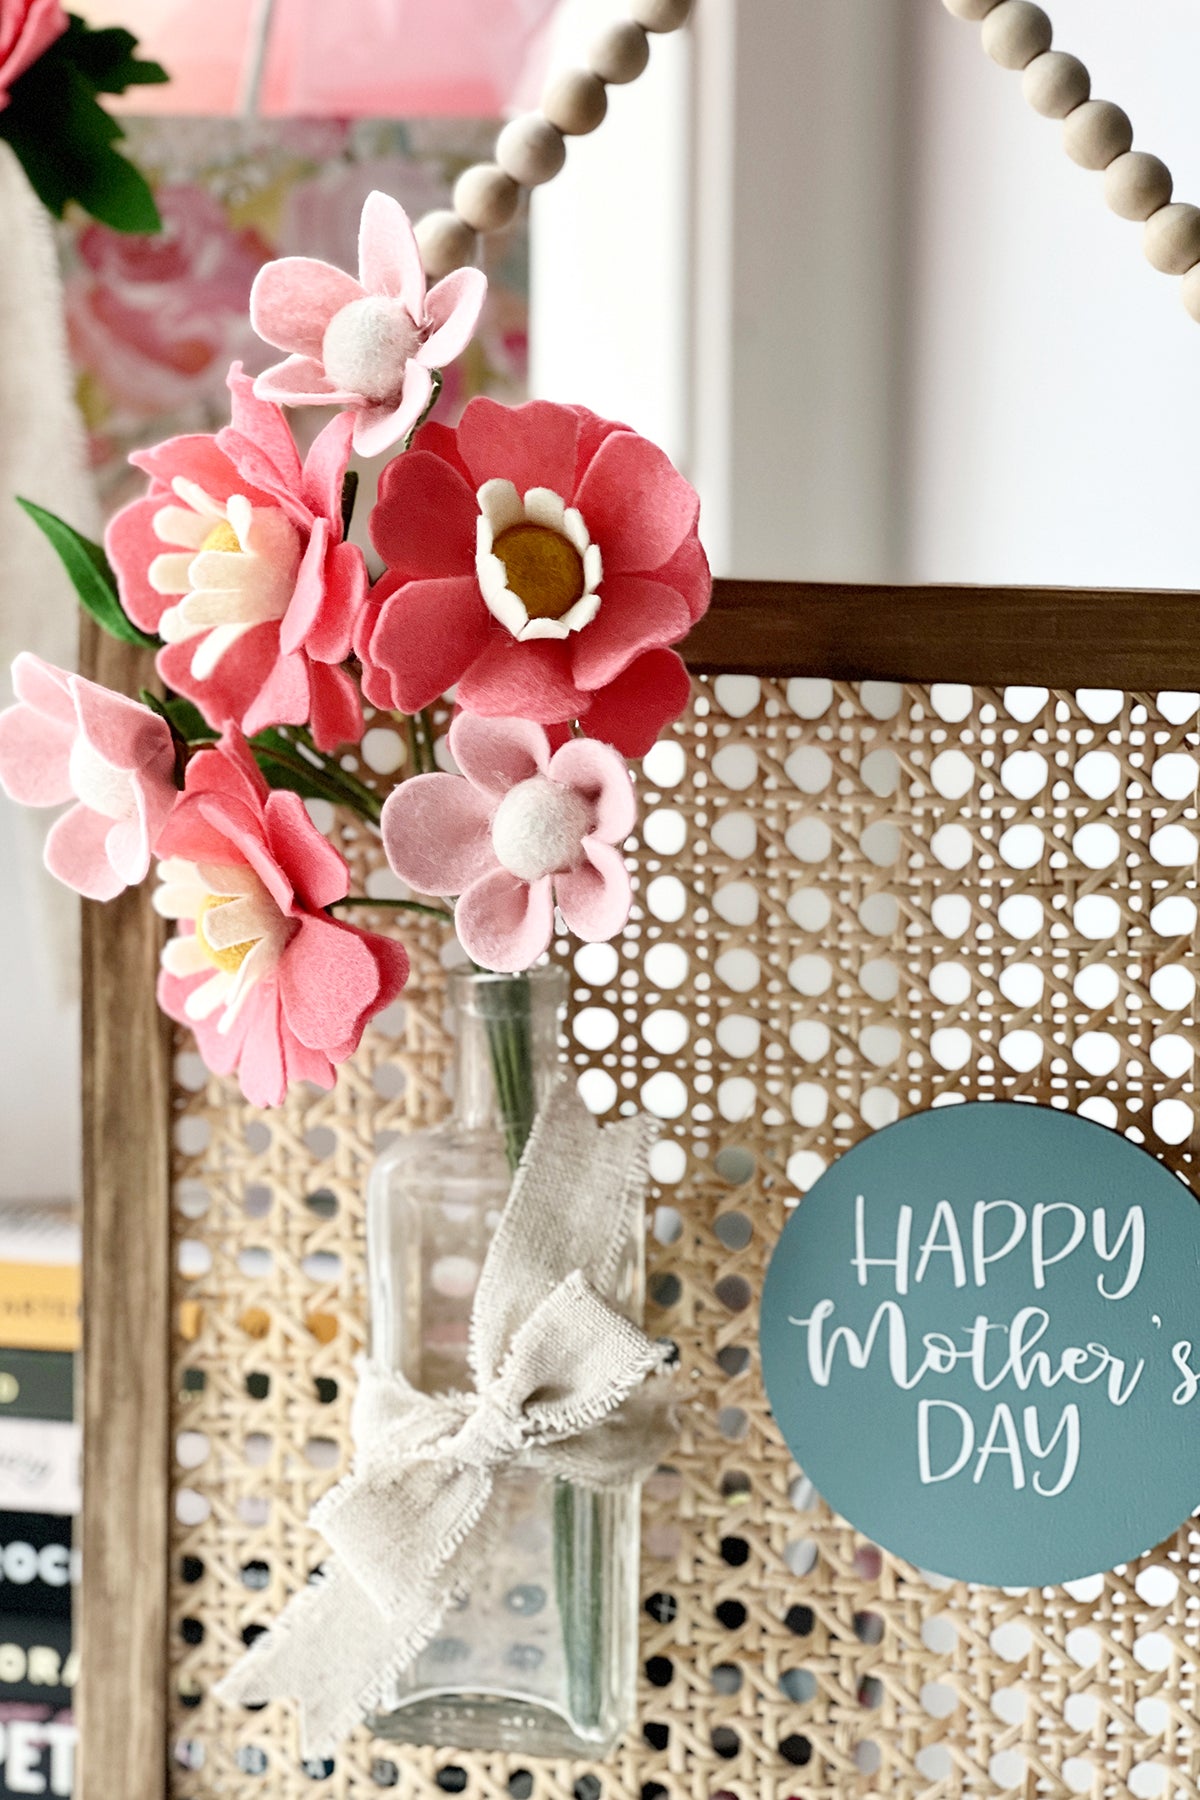
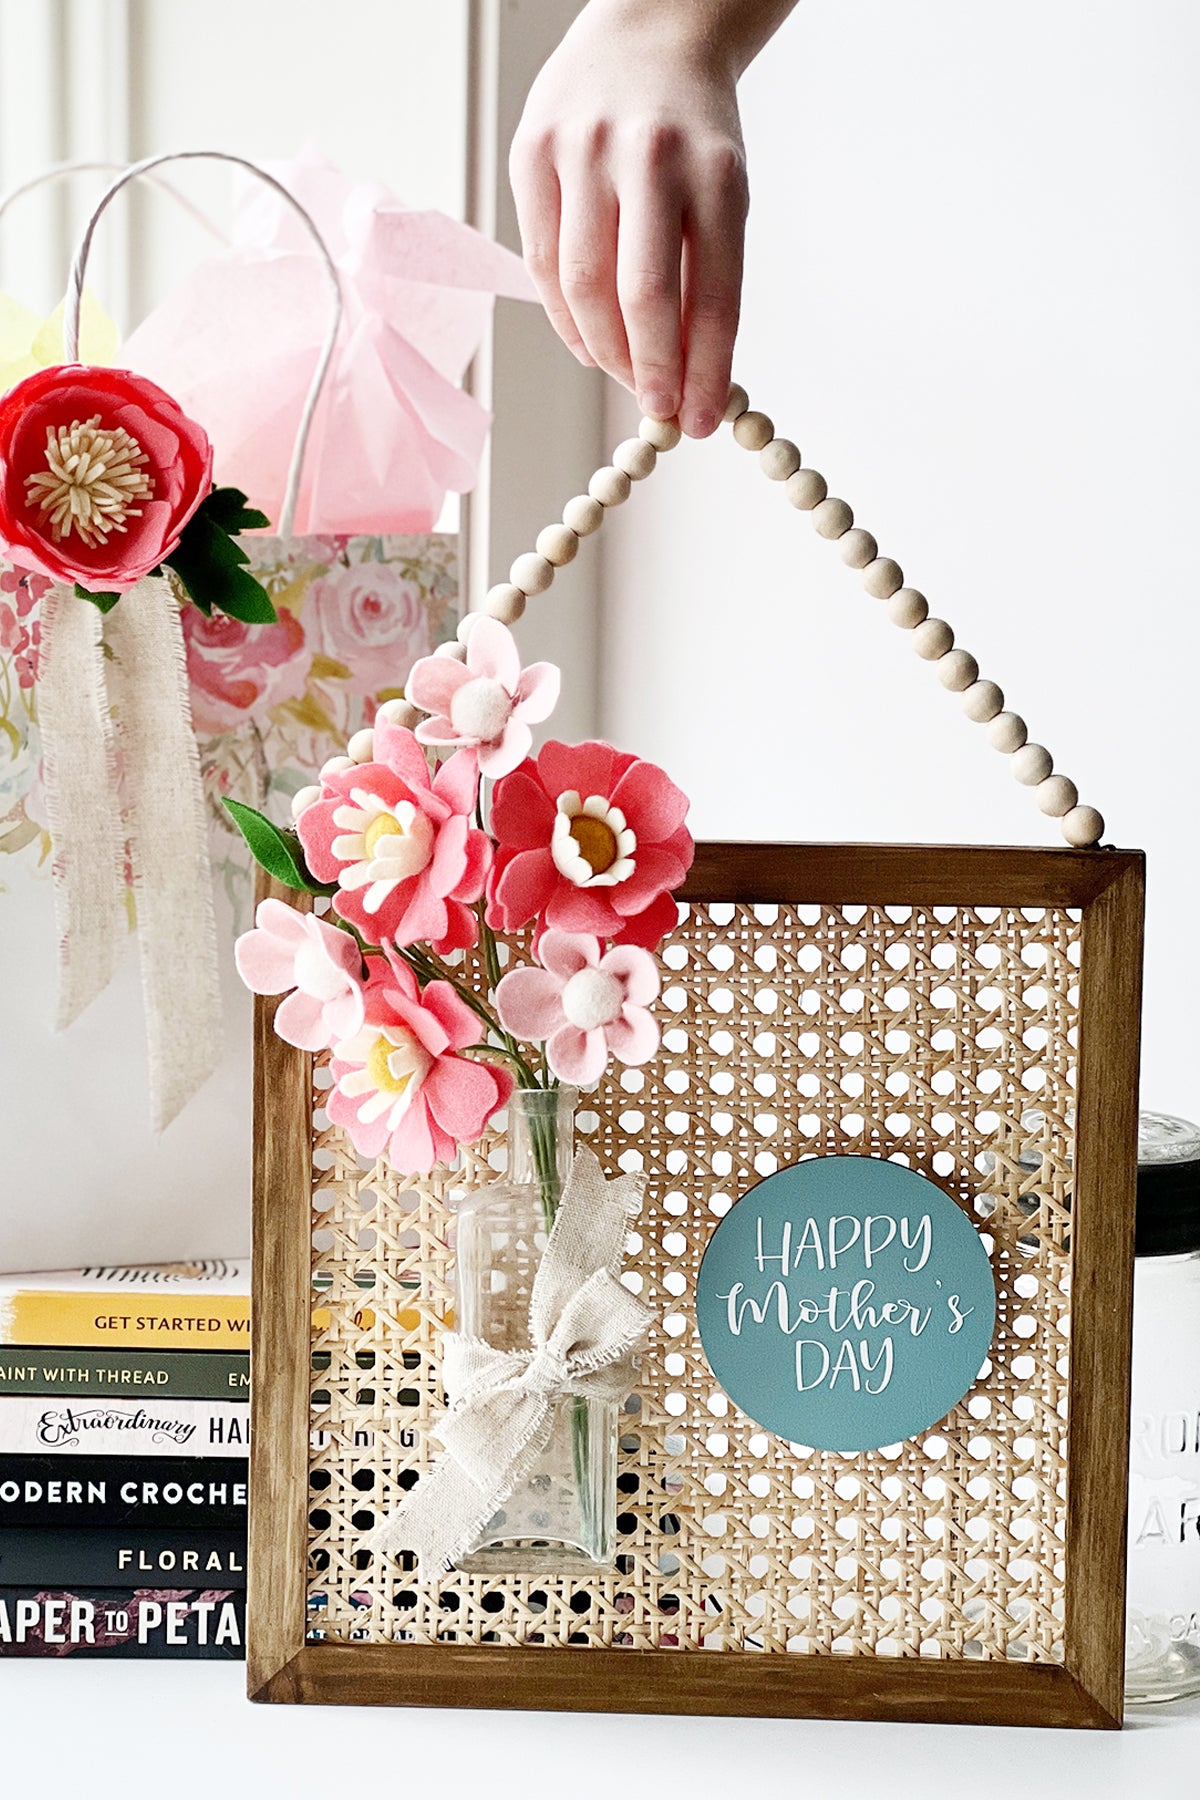
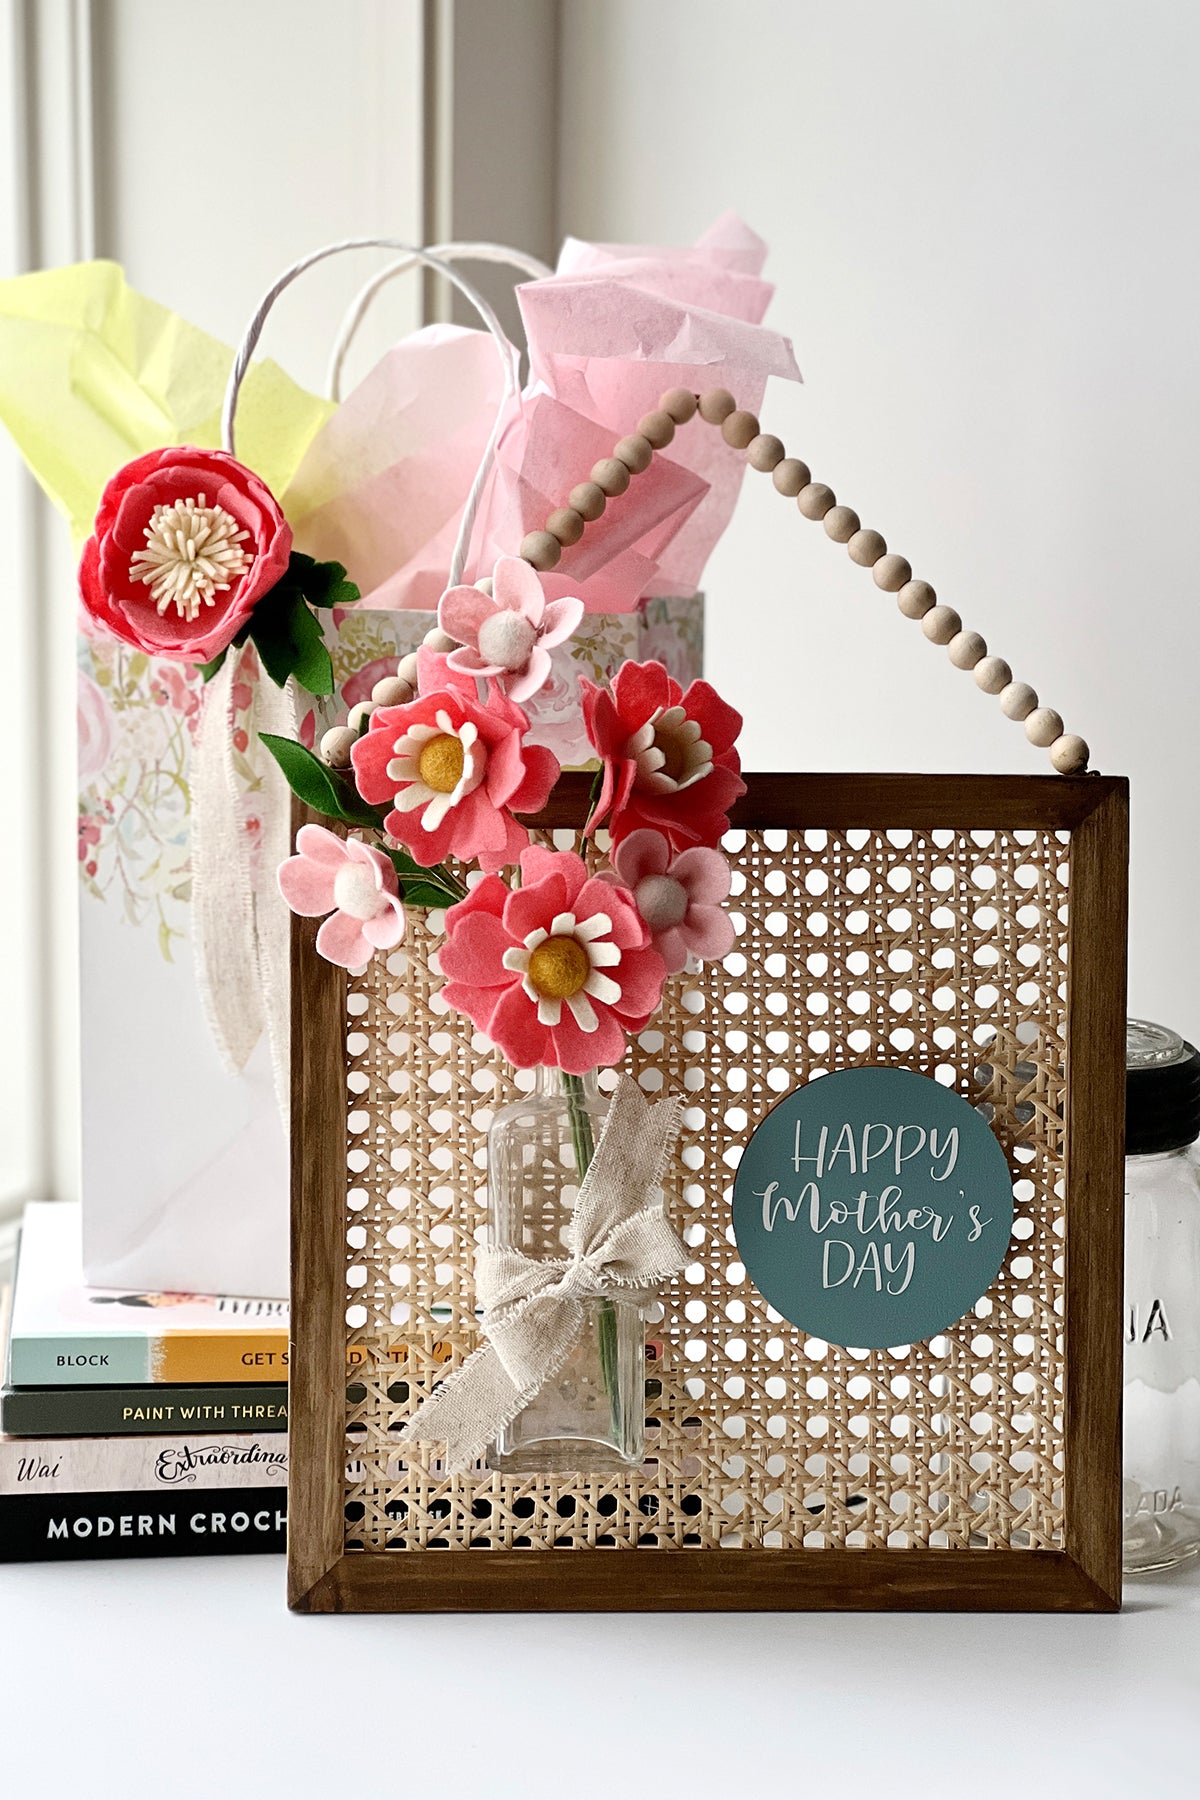
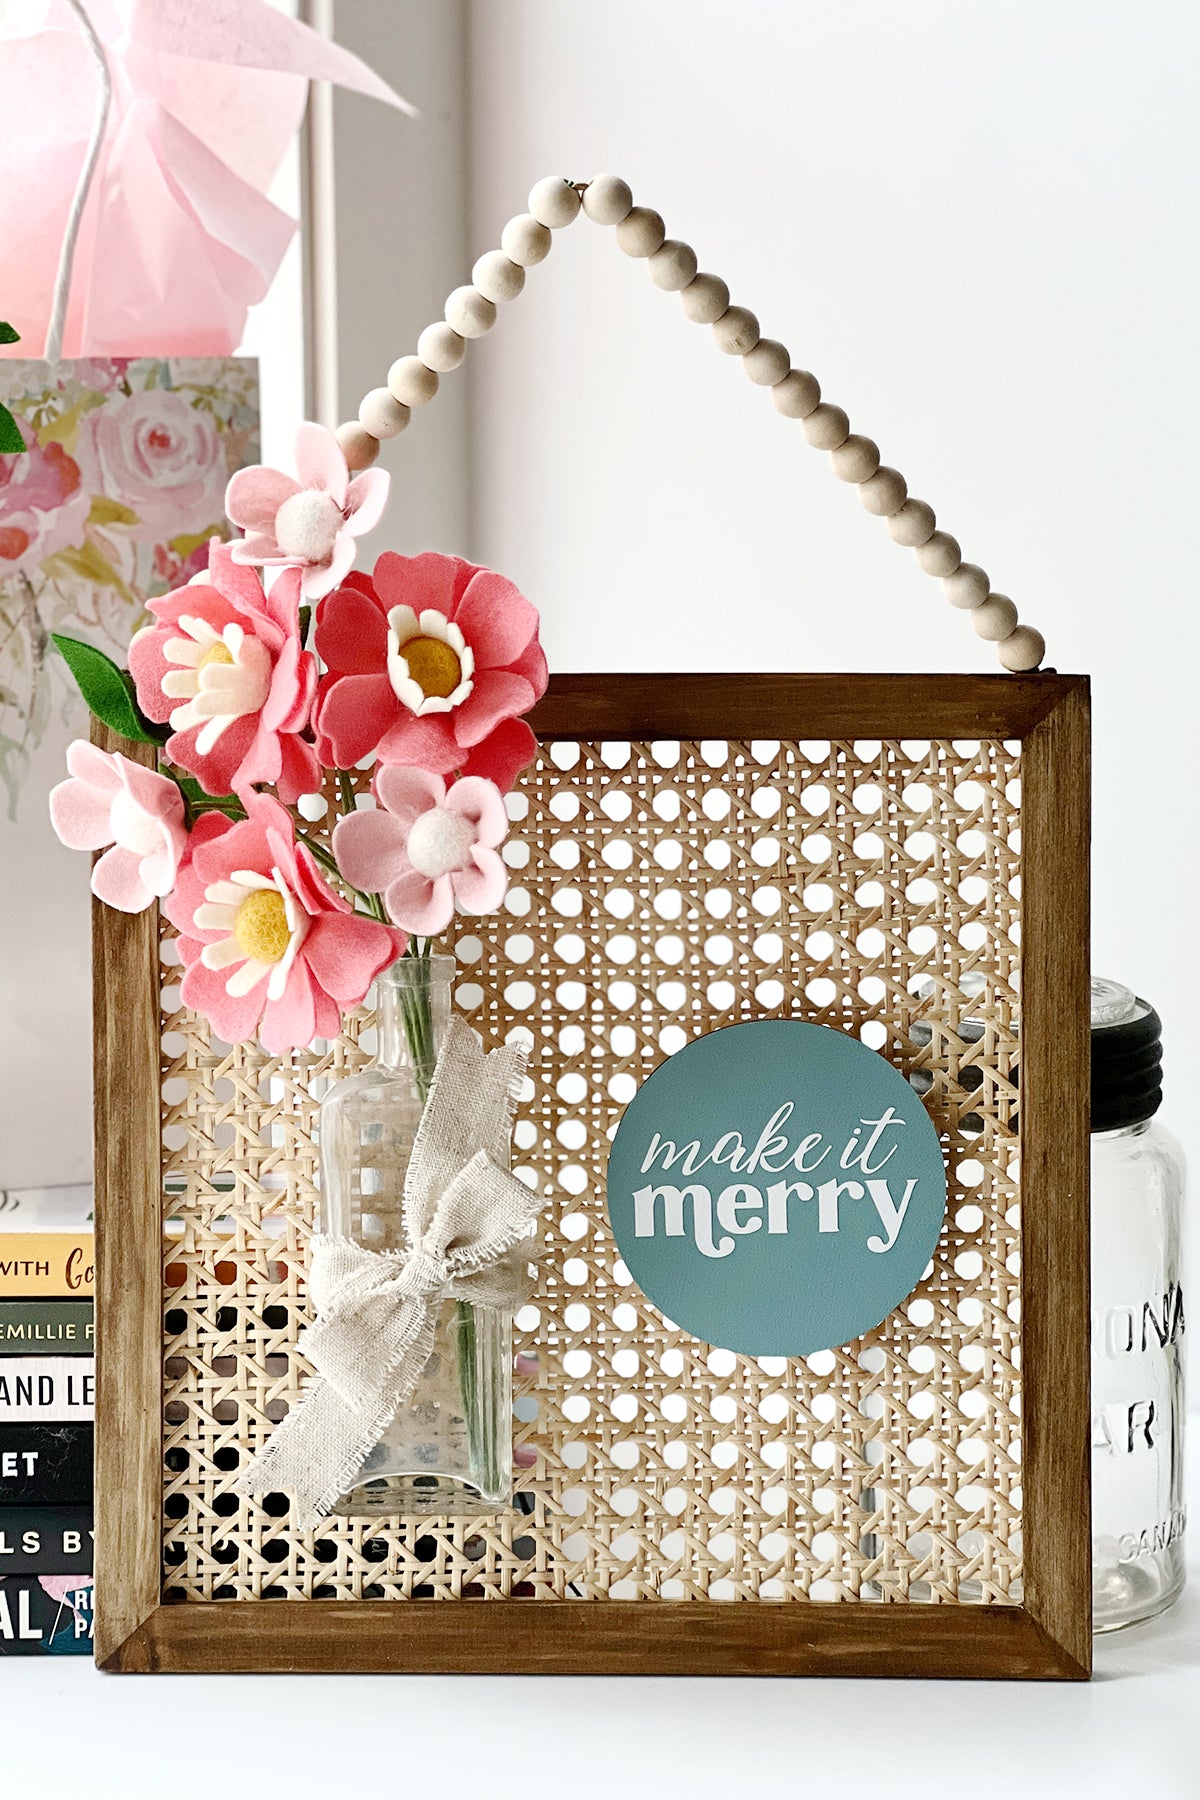
Now we are ready to create the interchangeable wall art. Wondering why I said that this wall art is interchangeable? First, you can remove the bouquet of felt flowers from the vase and replace them with seasonal felt flowers bouquets all year long. And second, a metal canning lid, magnets and wood coasters make it possible to change the message on your artwork to celebrate holidays and more. Use my DIY instructions as a guide but feel free to modify the project to create your own piece of art.
Let’s make the interchangeable wall art and add the felt bouquet:

Let’s gather our supplies and tools:
- Square Rattan and wood form*
- Glass bottle or jar (I used a small 6 x 2” vintage bottle )
- Zip tie large enough to wrap around your glass container
- Ribbon wide enough to cover the zip tie
- 4” wood round coasters
- Glue gun and glue sticks
- Paint and/or wood stain
- Rare-Earth magnets
- Metal canning lid
Optional:
- Crop-a-dile tool (if you want to add two holes to the canning lid) and twine or embroidery floss
- Add words to the wood coaster using paint, paint markers or vinyl cut lettering
*Just in case you are unable to find the rattan form that I used, keep reading for an alternative product.
-
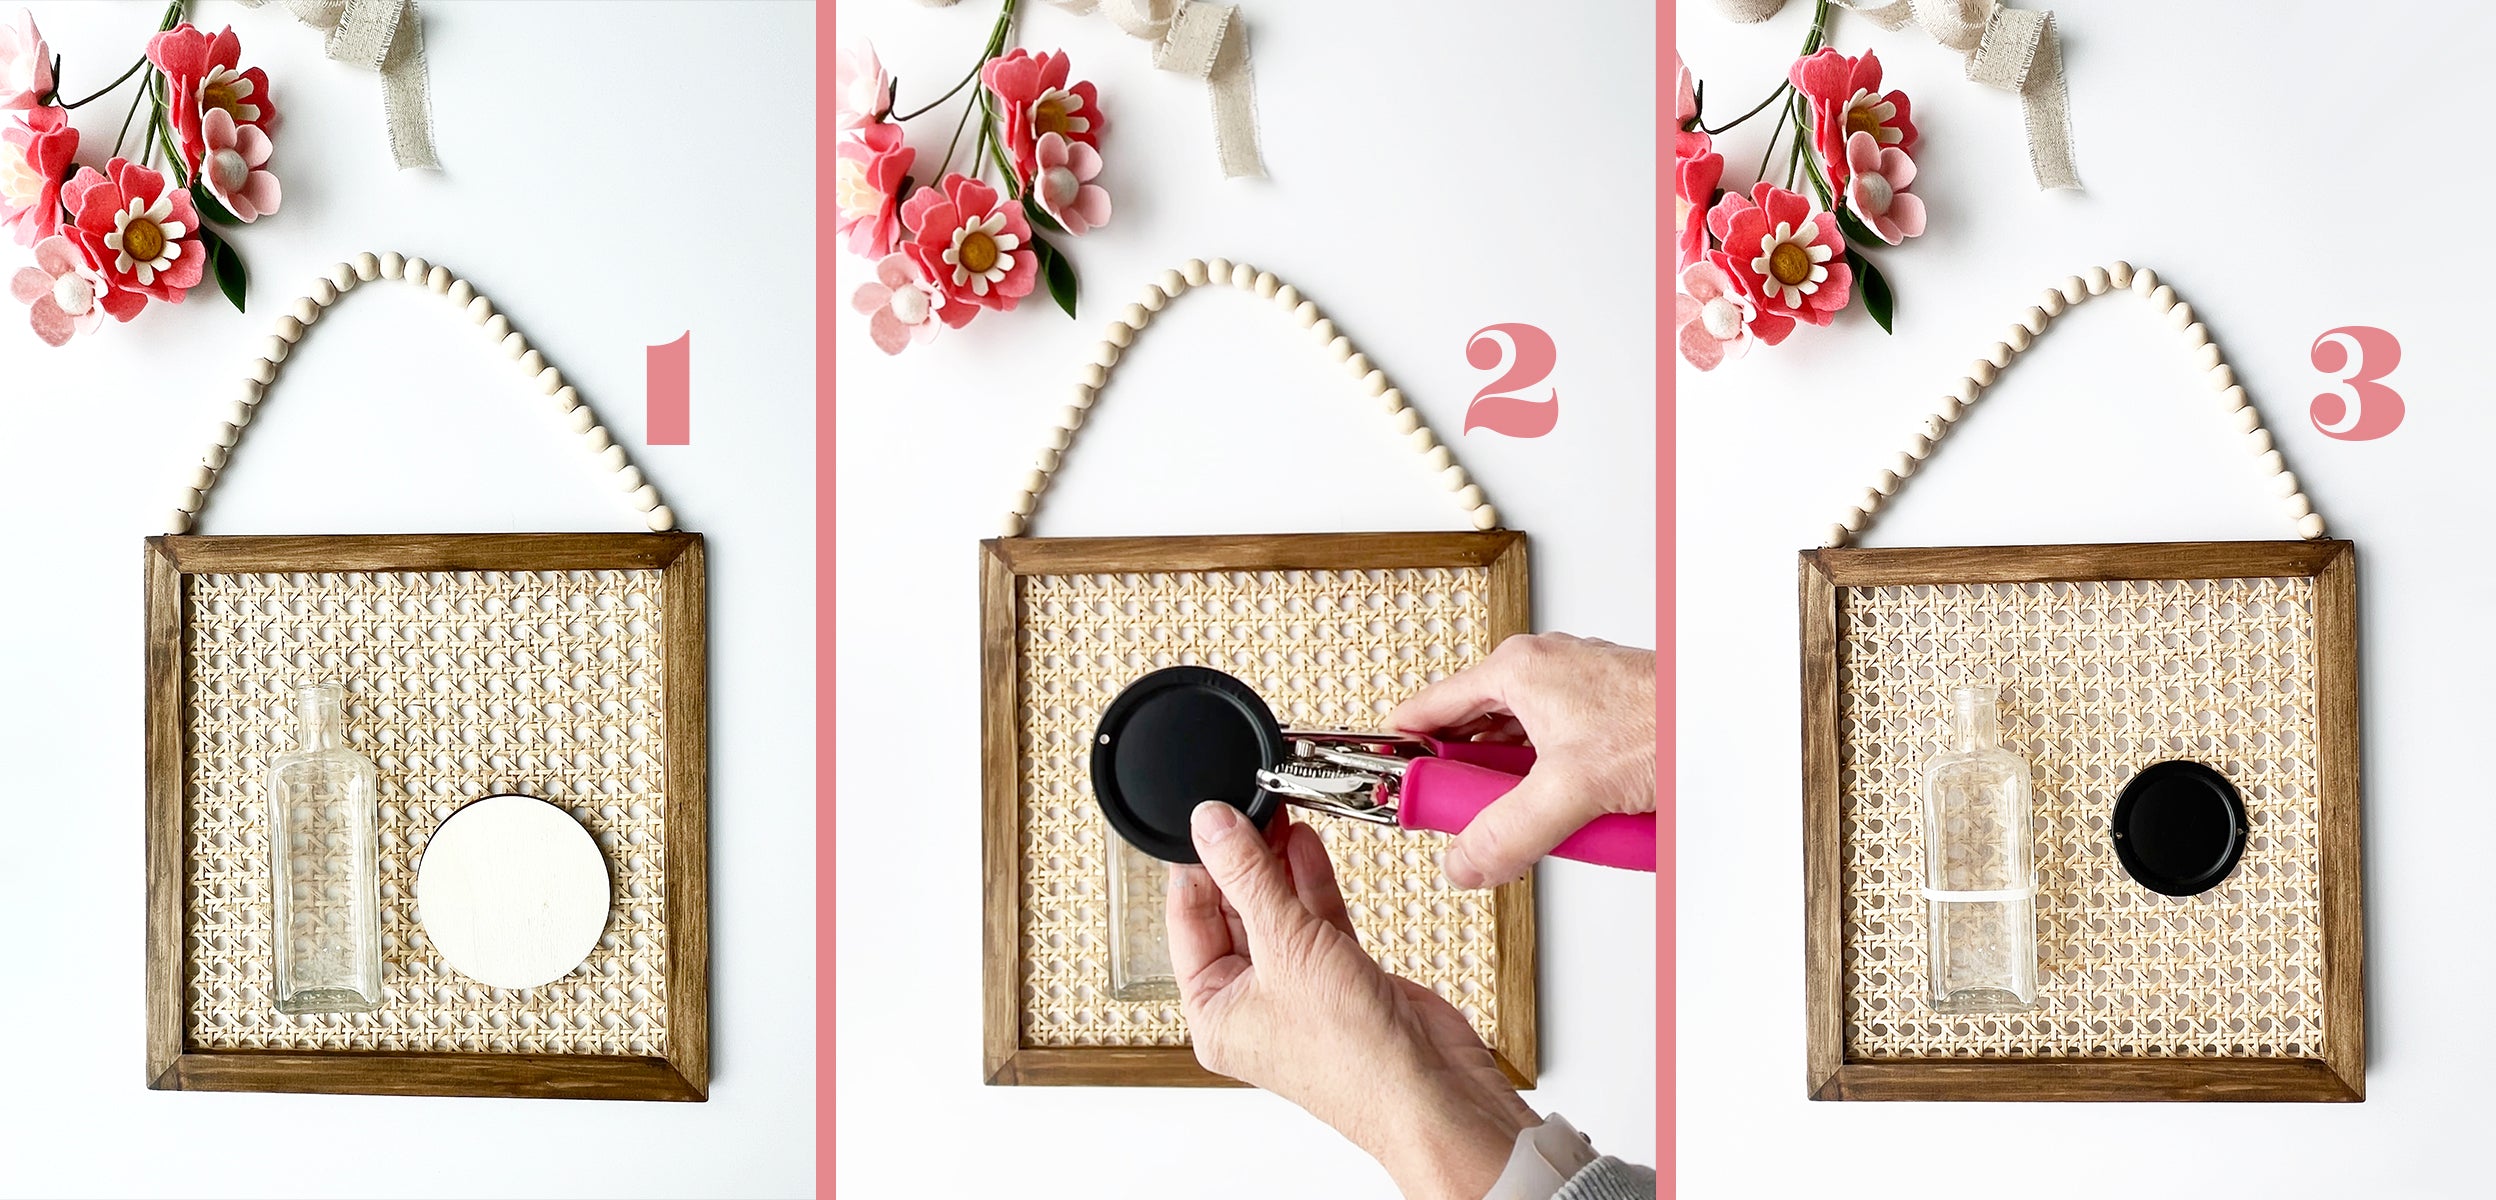
Stain or paint the wood frame to match your decor. Once dry, work out the placement of your glass container and the round wood coaster on the rattan form.
Note: I could have just glued these elements to the rattan form but I wanted to have the option of removing them in the future. - In order to use magnets on the wood coaster you will need to add a metal canning lid to the form. My lid was spray painted black. I made two small holes in the lid using the Crop-a-dile hole punch so that I could tie the lid to the form.

-
Attach the glass bottle to the rattan using a zip tie as shown. Attach the metal lid to the form using twine or embroidery floss.
Optional: If you don’t want to be able to remove these elements from the form, simply use an extra strength adhesive to attach the bottle and metal lid directly to the form. - Glue an Earth magnet to the back of the wood coasters.
- Decorate the wood coaster however you wish. Paint or stain the coasters and customize them with seasonal and holiday sayings. You can add lettering using paint, paint markers, chalk or vinyl. I used my Cricut Joy and Cricut vinyl to embellish my wood coasters.
Get creative. Can’t find a rattan wood form to recreate this project? Don’t let that stop you from making an interchangeable wall art. Check out your local art stores or the dollar stores for wood panels!
Project details:
- I drilled two holes into this 8 x 10” wood panel.
- A zip tie was used to hold the glass jar in place.
- I added a fun Posecard by Doris Wai from Love Lettering to my floral bouquet.
And that is it! I hope that this post inspires you to make a floral bouquet for Mother’s Day or anytime of the year! If you do, I would love to see your finished project.
Please tag @the_felt_store and myself at @makeandmerryco so we can see what you are creating.
Leave a comment